Fusillade Downpour Continental Challenge: High-Score Strategy |
| 时间:2026-09-07 12:58:08 来源: 作者: |
In the Continental Challenge, Travelers must build lineups with different heroes and take on up to six bosses. This guide provides lineup configurations for each boss to help Travelers plan their approach.
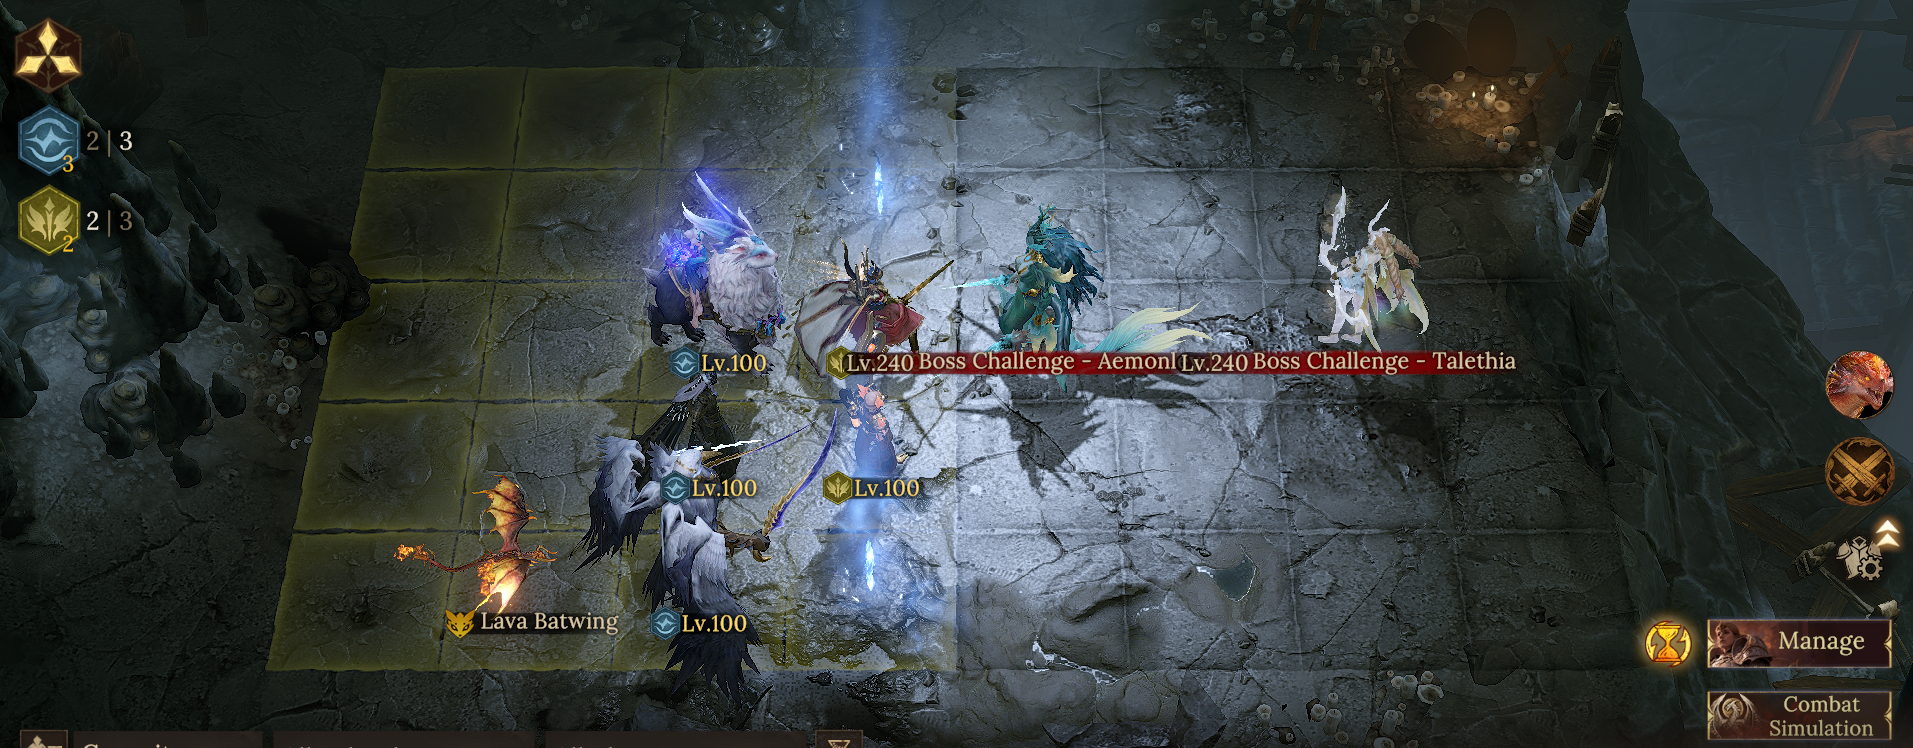
[Talethia]Team Composition: Rena + Journ + Perkunte + Alaura + Tariz
●Team Aura/Familiar
Use Alaura's Attack Aura with the Batwing Familiar to maximize the team's damage output.
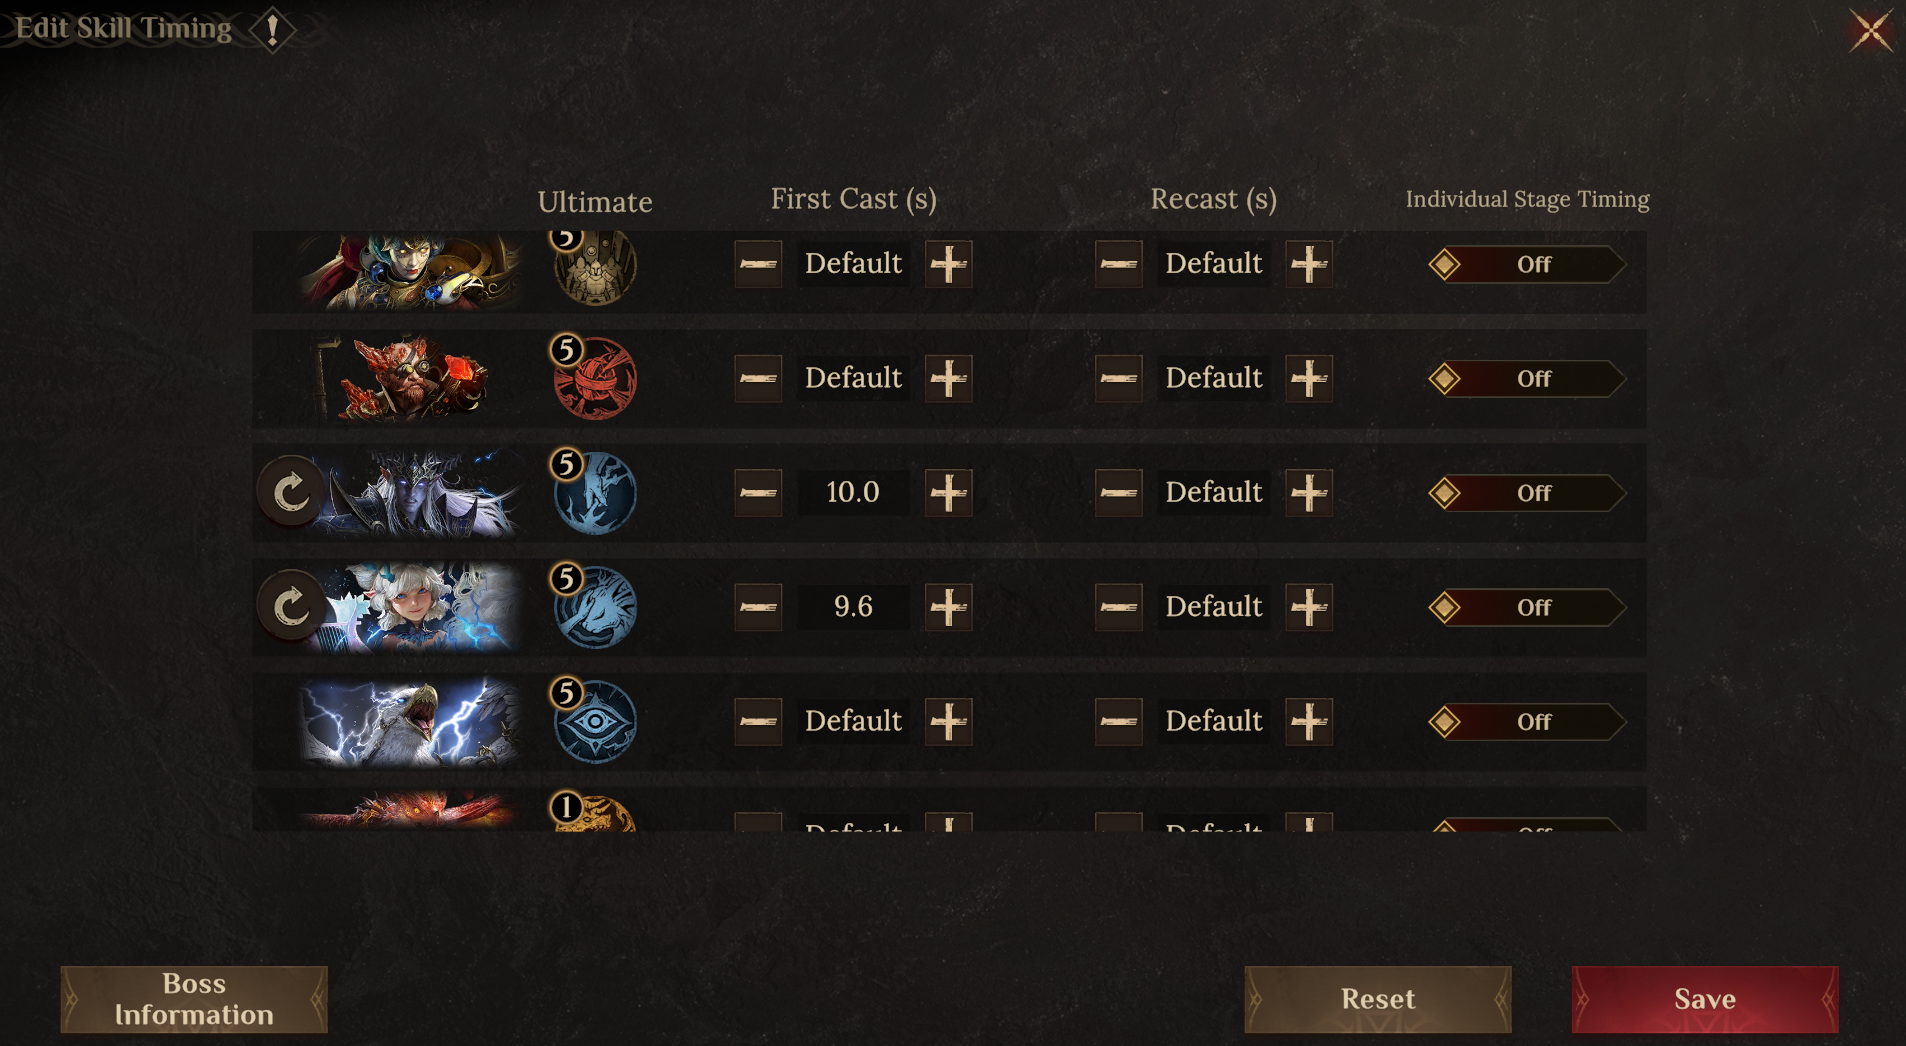
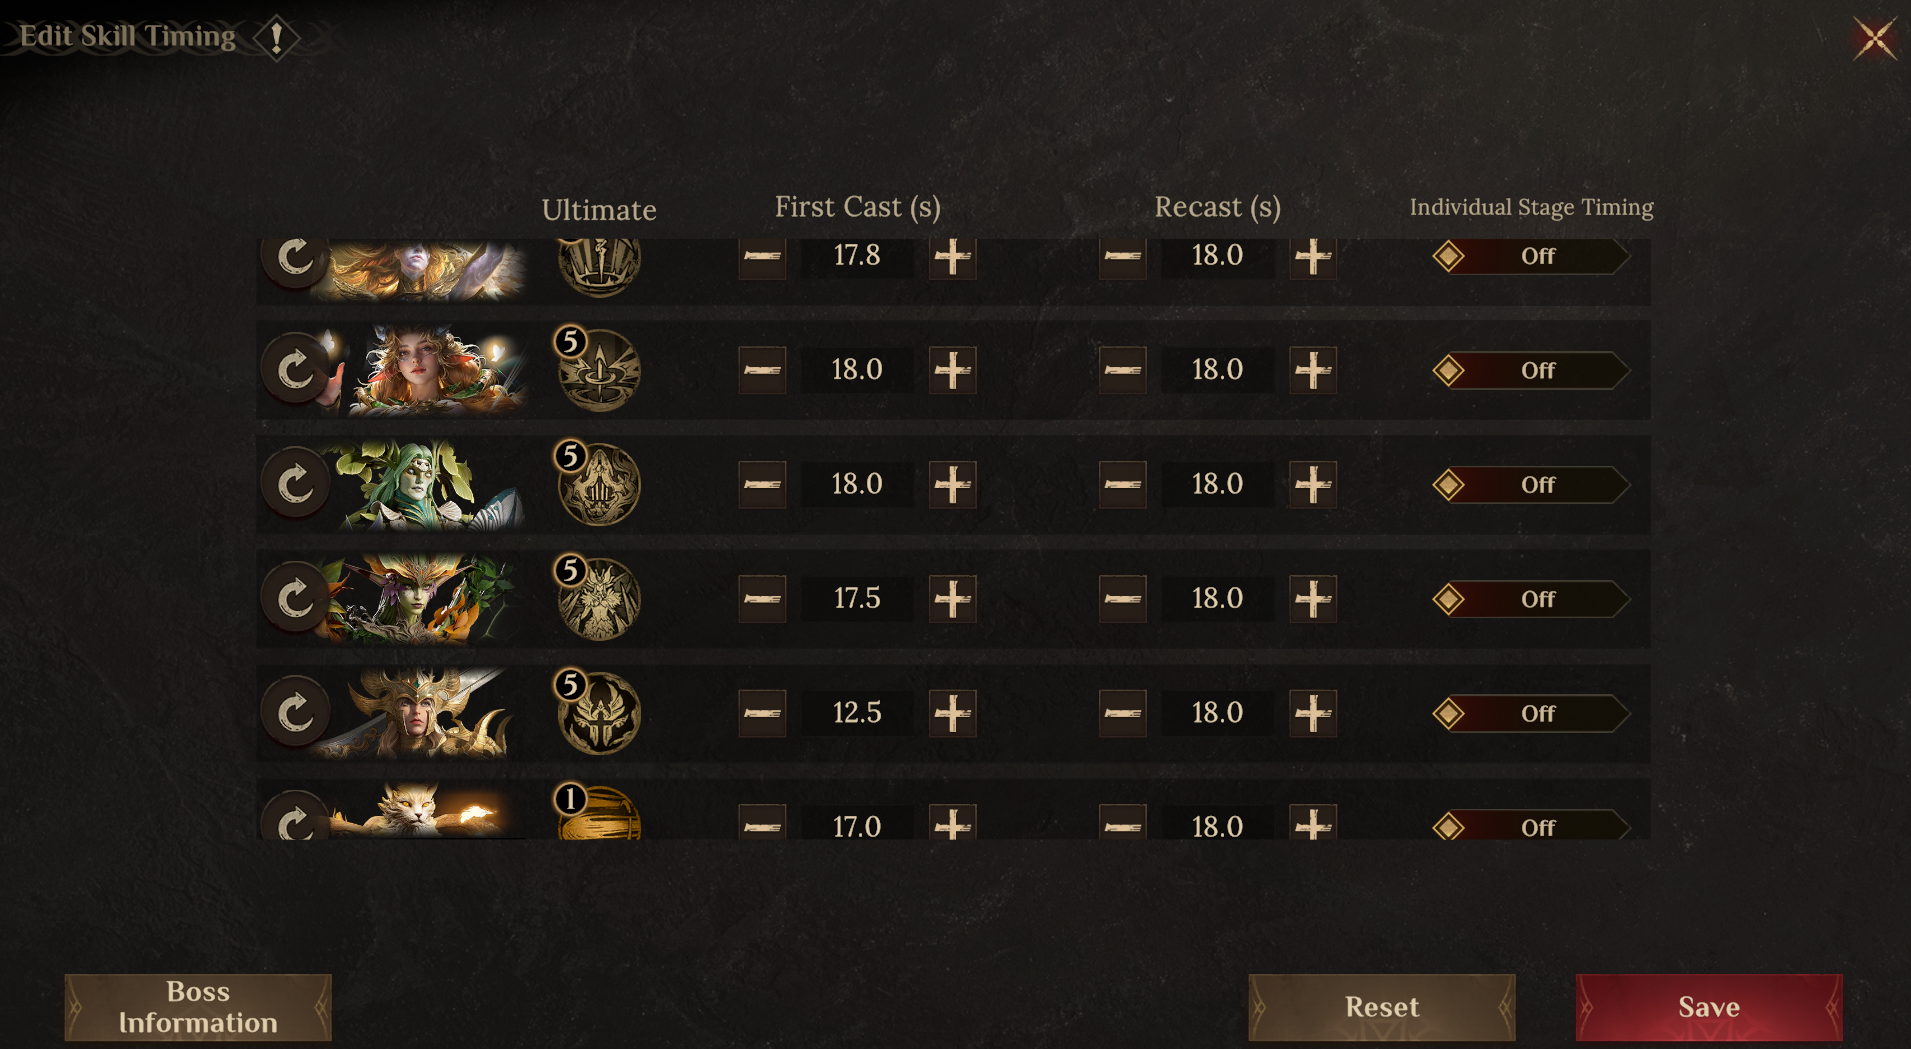
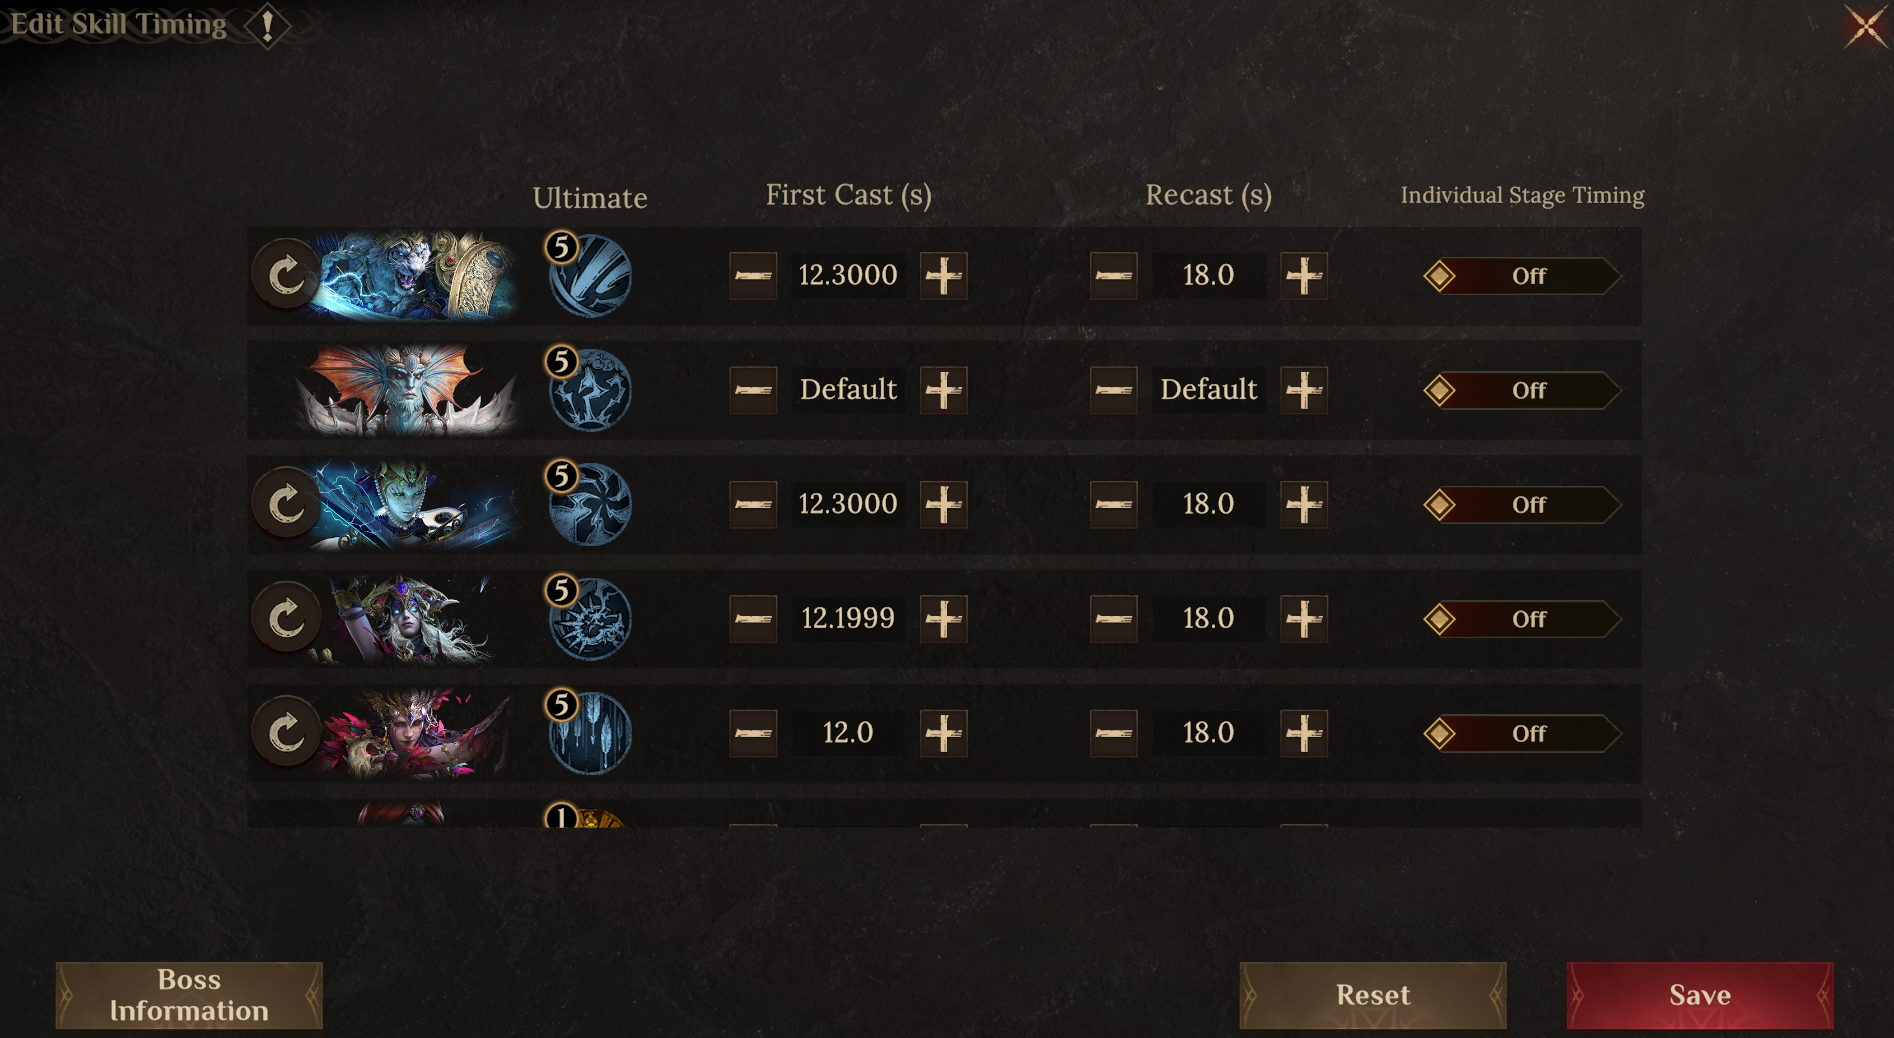
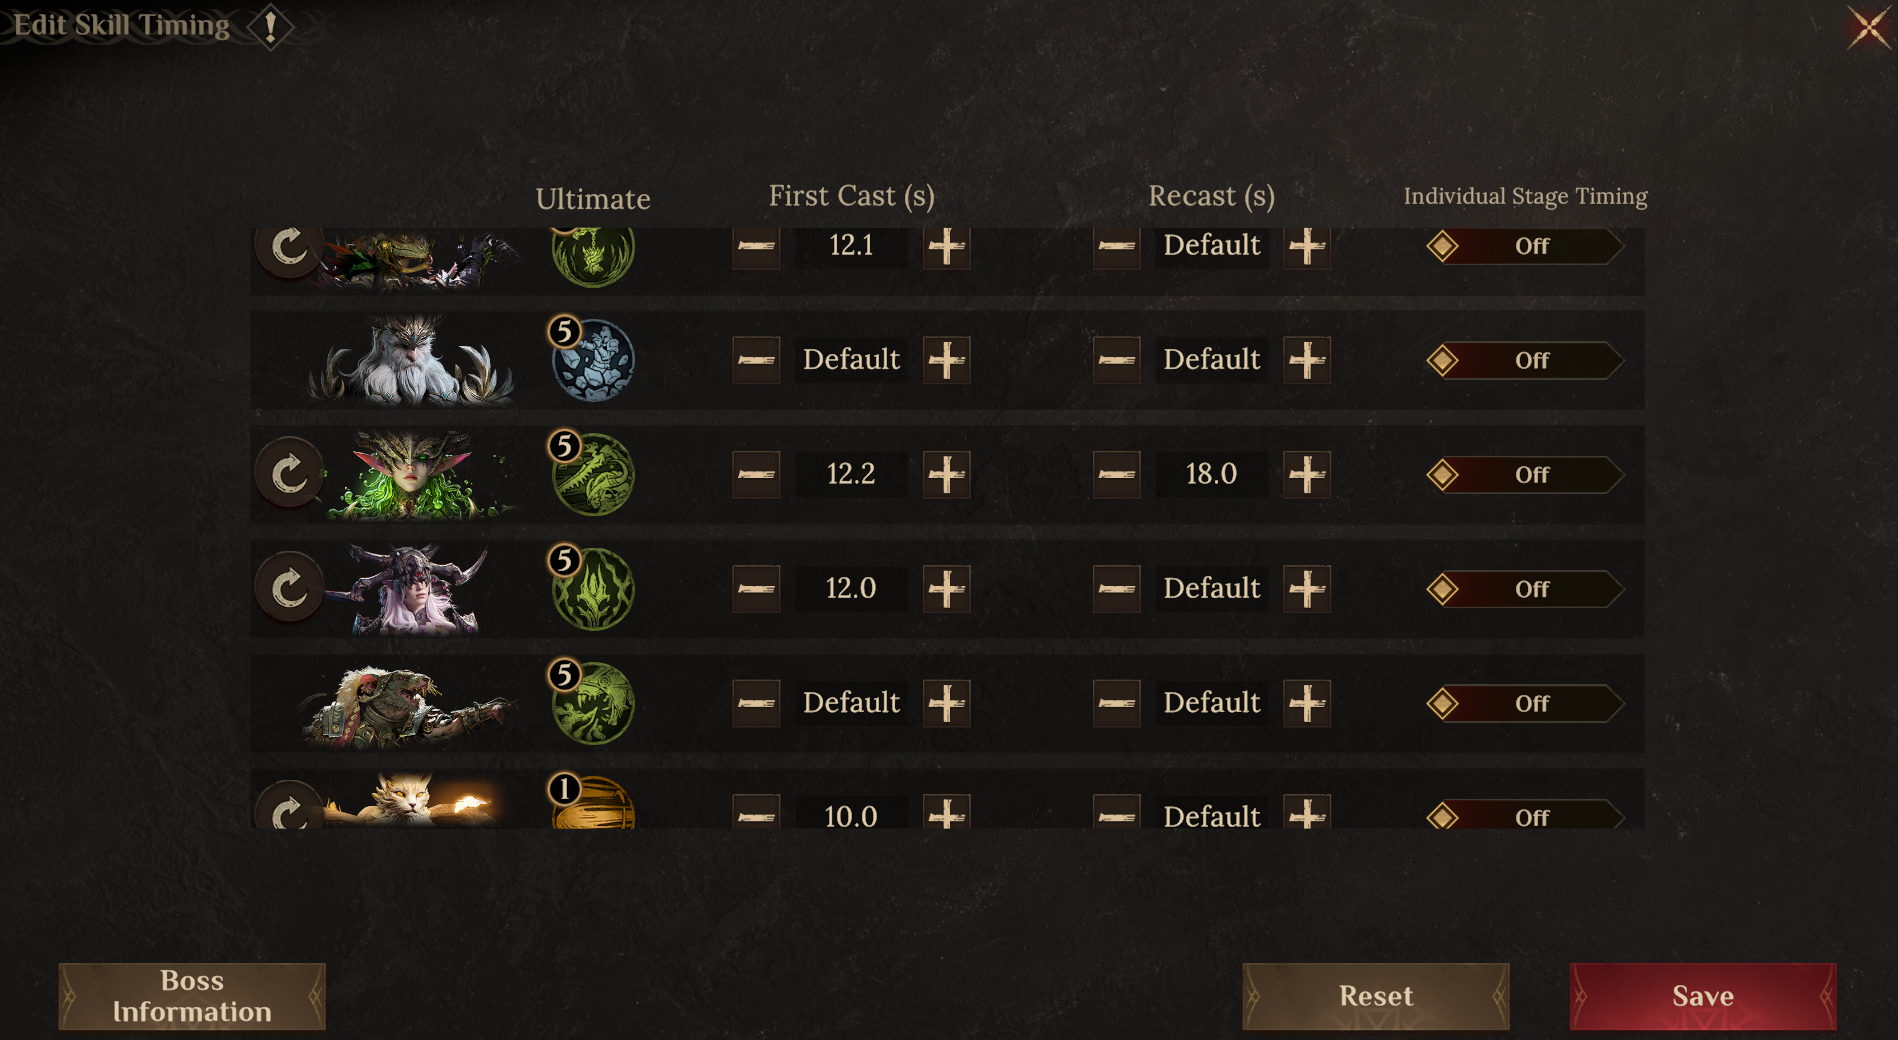
●Skill Timing Reference
Perkunte and Alaura do not need preset skill timing when their Skill Haste values match.
●Notes
1. Position heroes as shown, with Rena taking the brunt of the attacks, and ensure all allied heroes benefit from the Defense Up and Ultimate Energy increase provided by Journ;
2. Journ + Rena can be replaced based on the hero's available heroes with any Support pair that has Dispel Buffs/Buff Prohibition capabilities and can help the team Survive, such as Solmo + Khrysos or Thormer + Journ. Just make sure the team includes heroes of three different elements to activate the stage's special Buff;
3. Since this lineup gives up 5-hero Affinity to activate the stage's special Buff, Journ and Rena should stack as many survivability stats as possible. Consider having Tariz stack >300 Accuracy and equip Primal Resonance to share stats with allies. Travelers without Tariz can replace him with Shai'nachtan
●Hero Replacement Reference

Healing
Grant Multiple Buffs
Increase Ultimate Energy
|
Dispel Buffs
Increase Ultimate Energy
Attack Penalty
|

Increase Ally Damage Output
Trigger Lightning Chain
|

Increase Ally Damage Output
Secondary Damage Output
|

Main Forces Damage Output
|
| Replacement Reference |

Healing
Defense Up
|

Dispel Buffs
Attack Penalty
|

Trigger Lightning Chain
|

Inflict Electrocuted
|

Main Forces Damage Output
|
Build Reference●Key Attribute Requirements
Tariz: Accuracy > 300; Journ: Accuracy > 200;
Rena, Journ, and Tariz: stack Skill Haste as high as possible;
Perkunte and Alaura must have matching Skill Haste
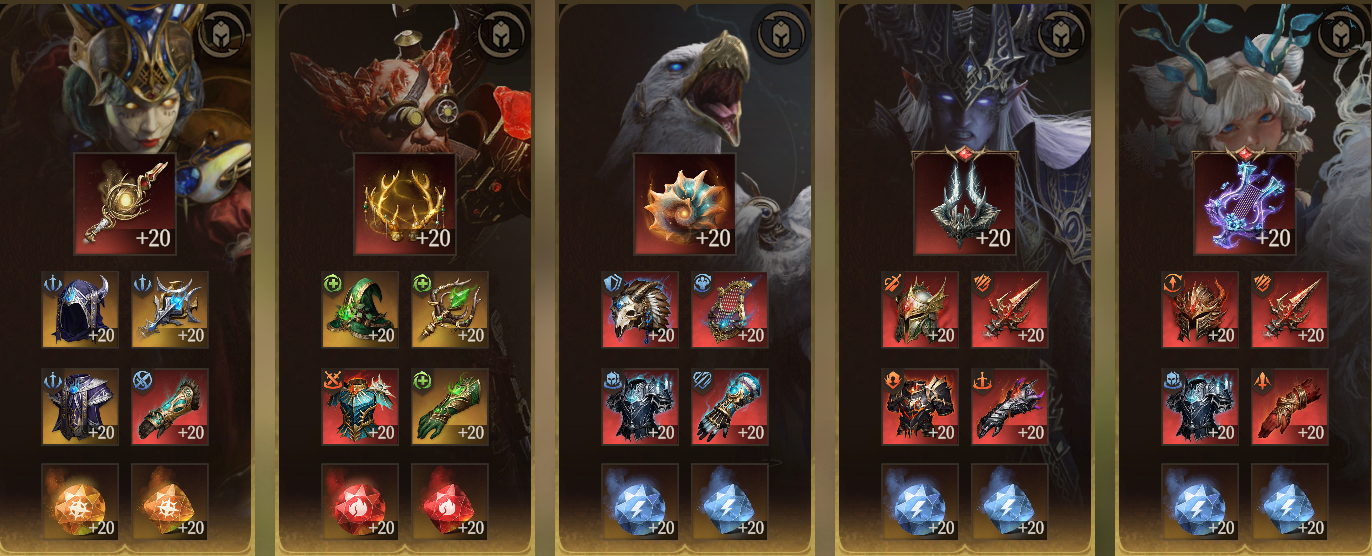
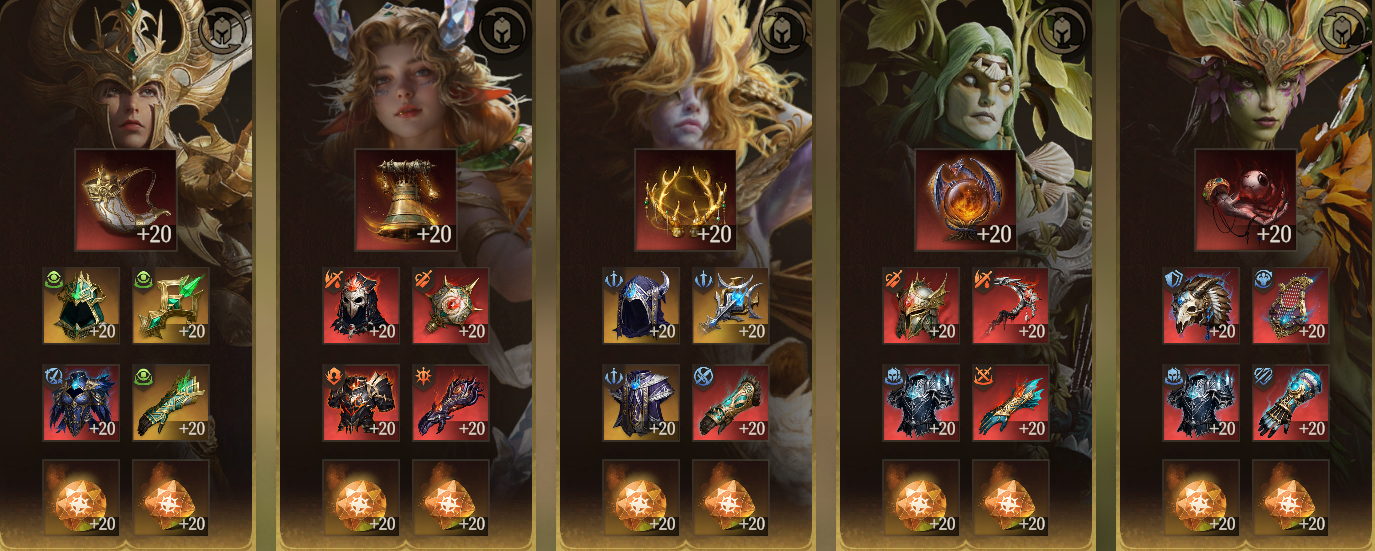
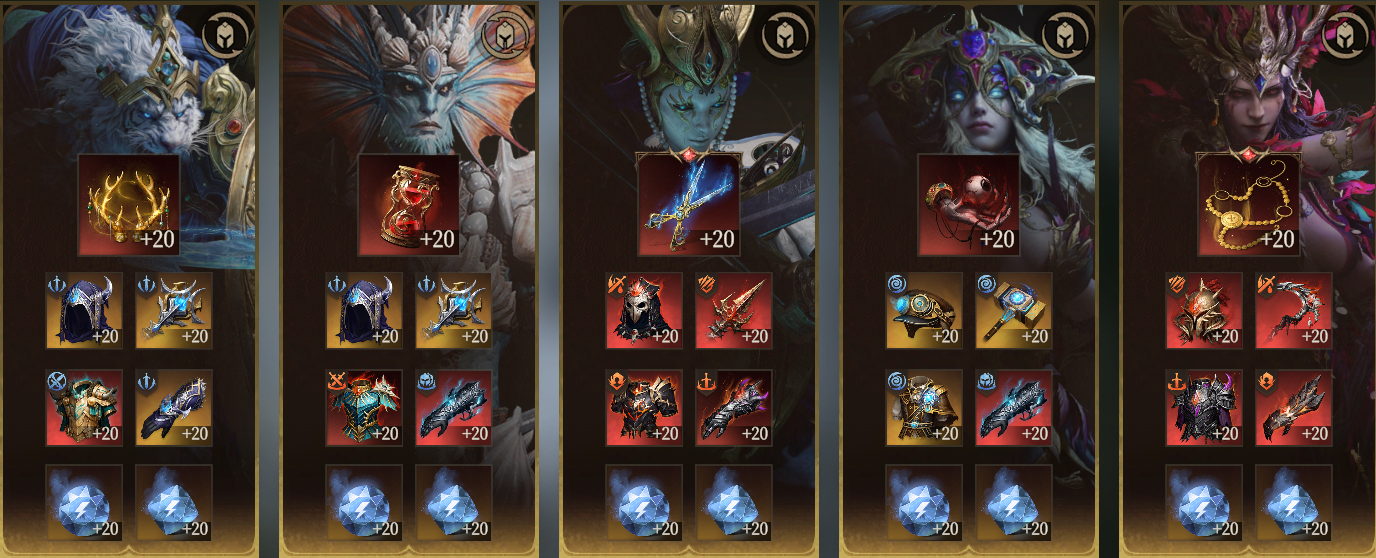
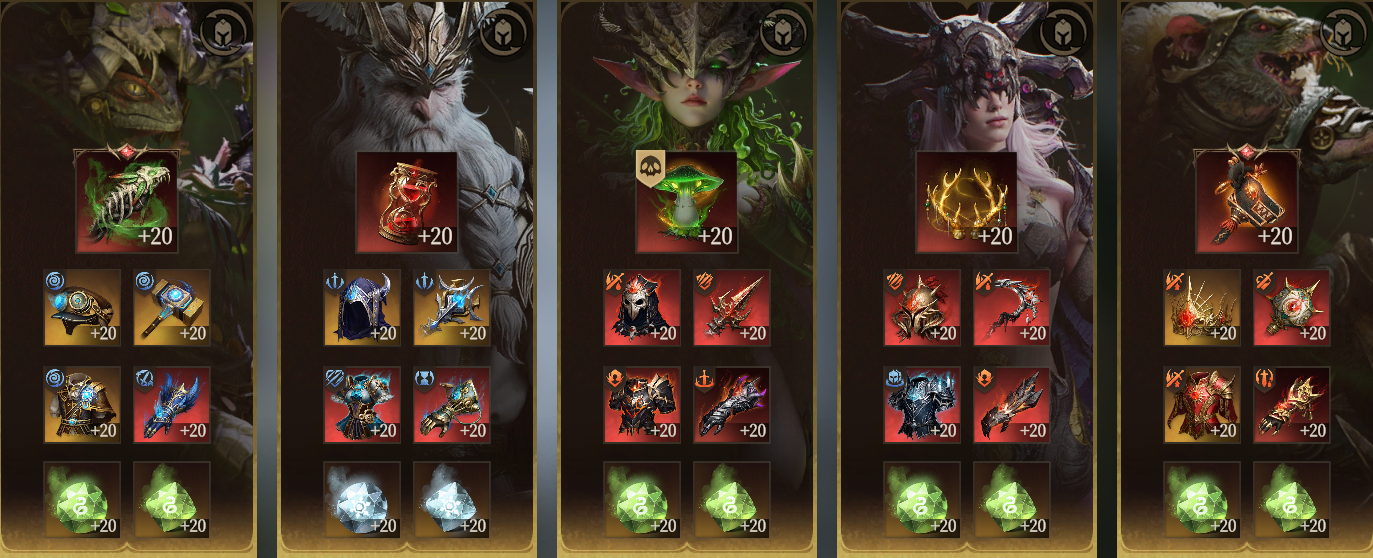
●Gear Reference
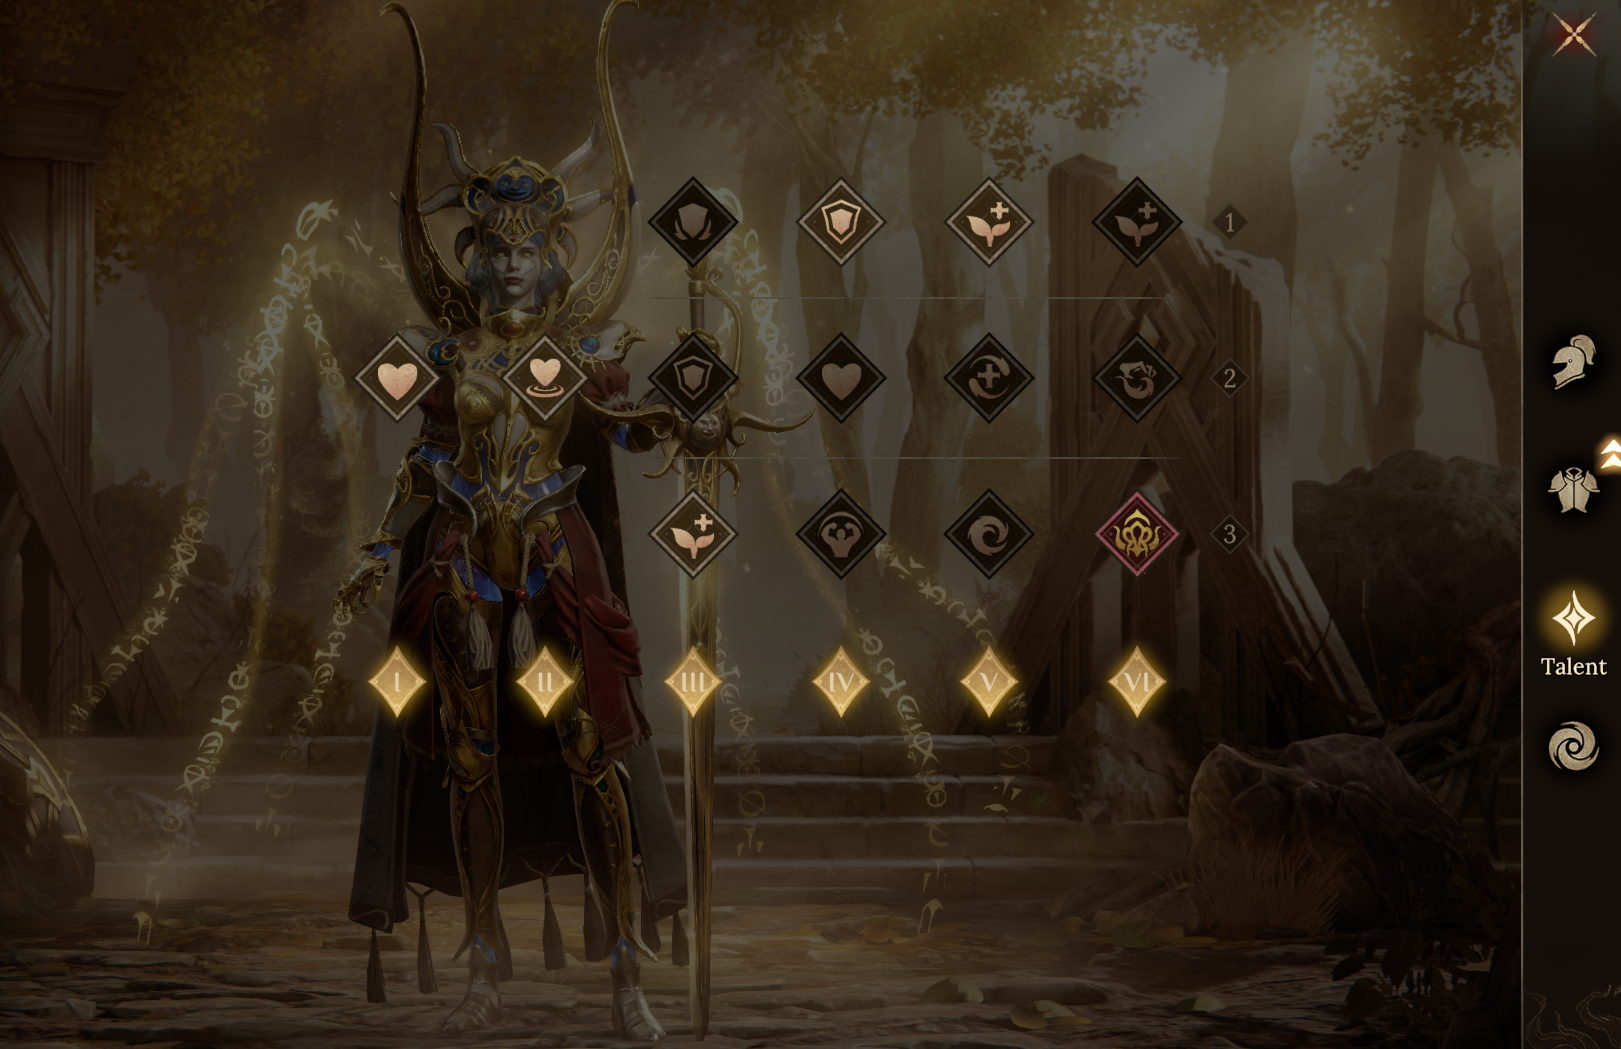
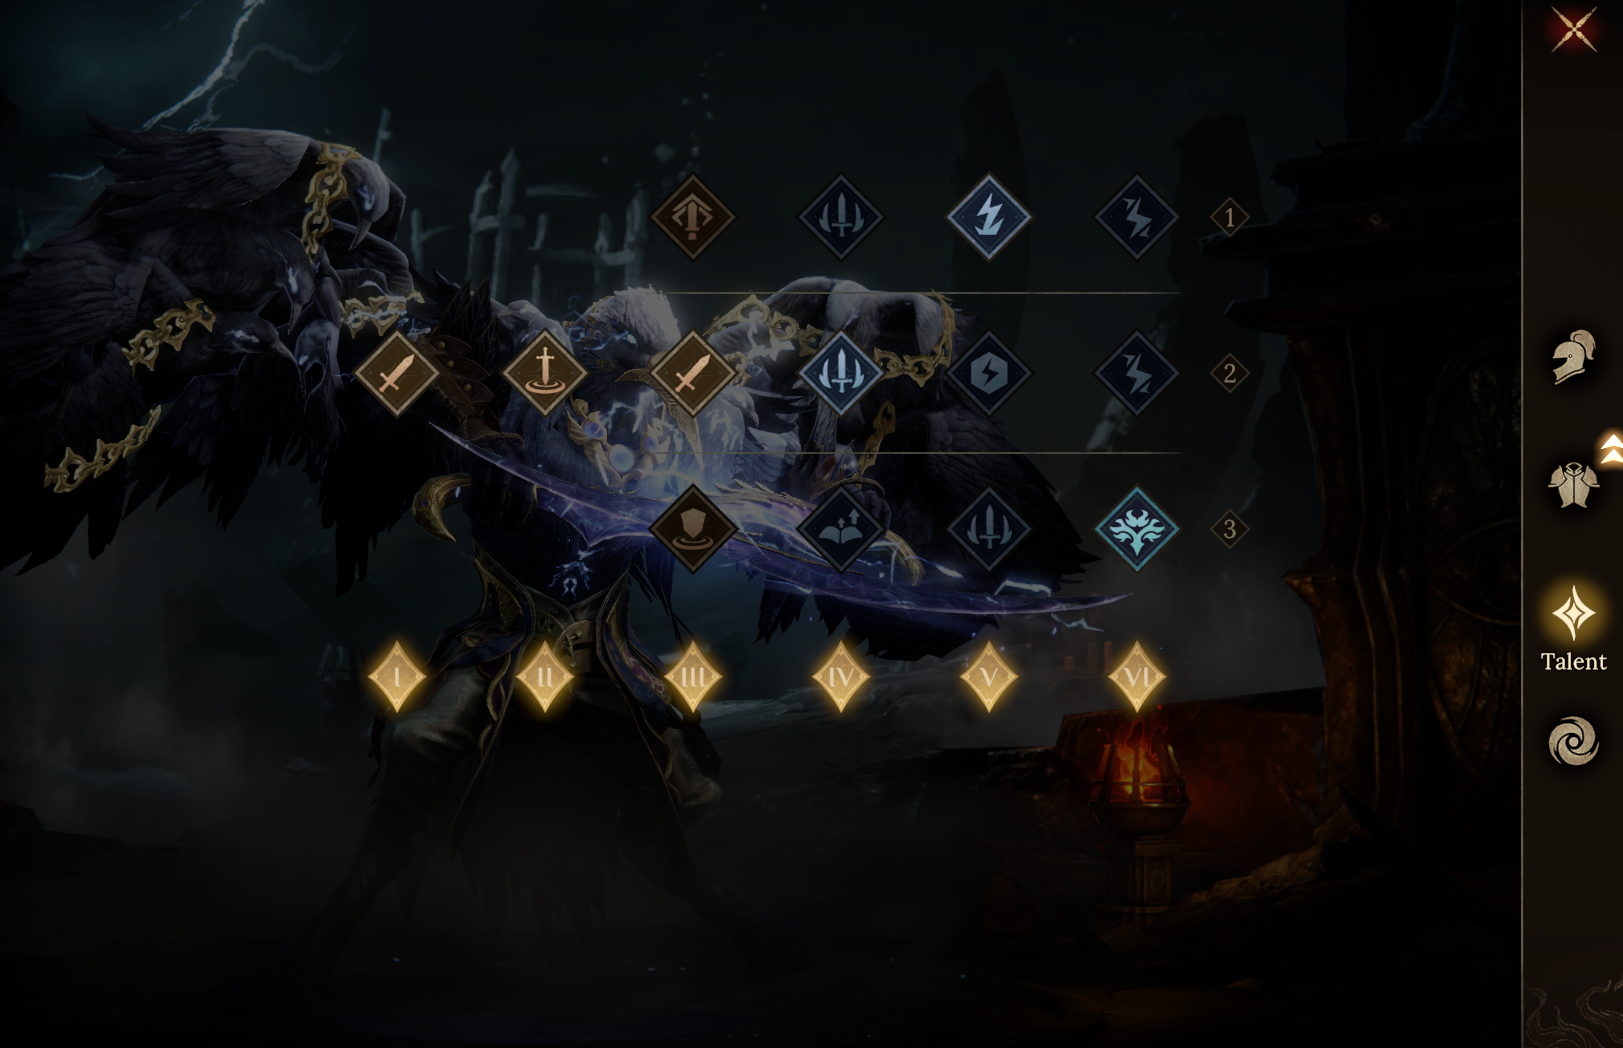
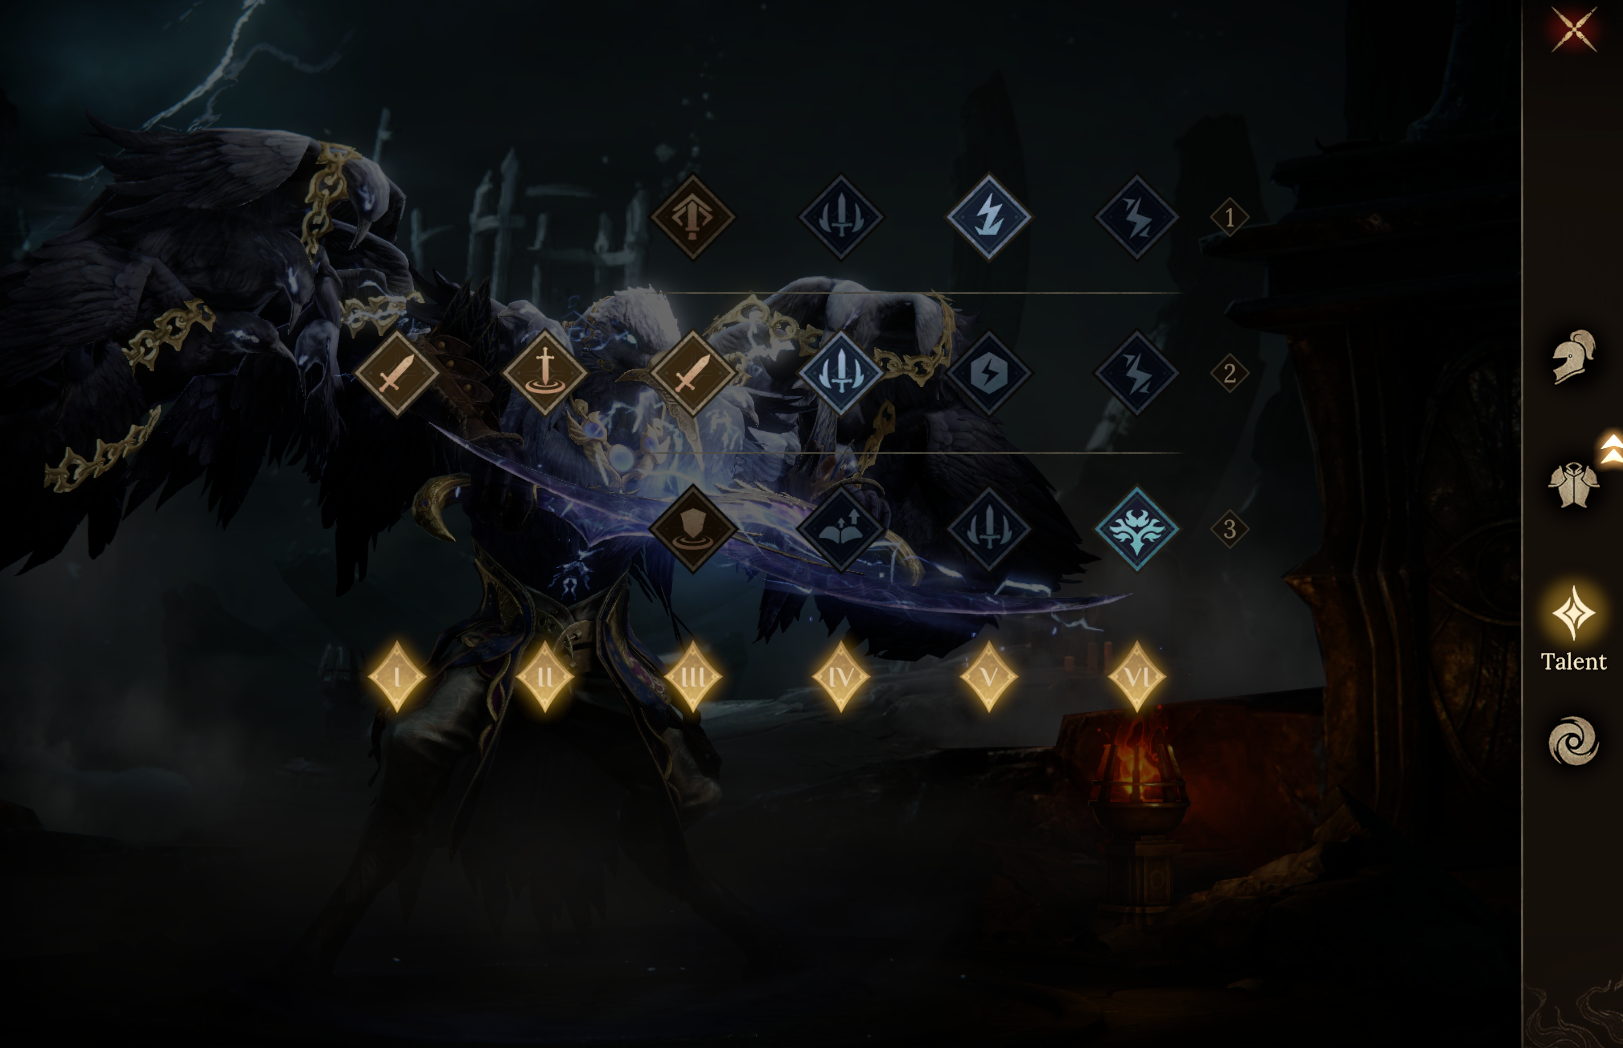
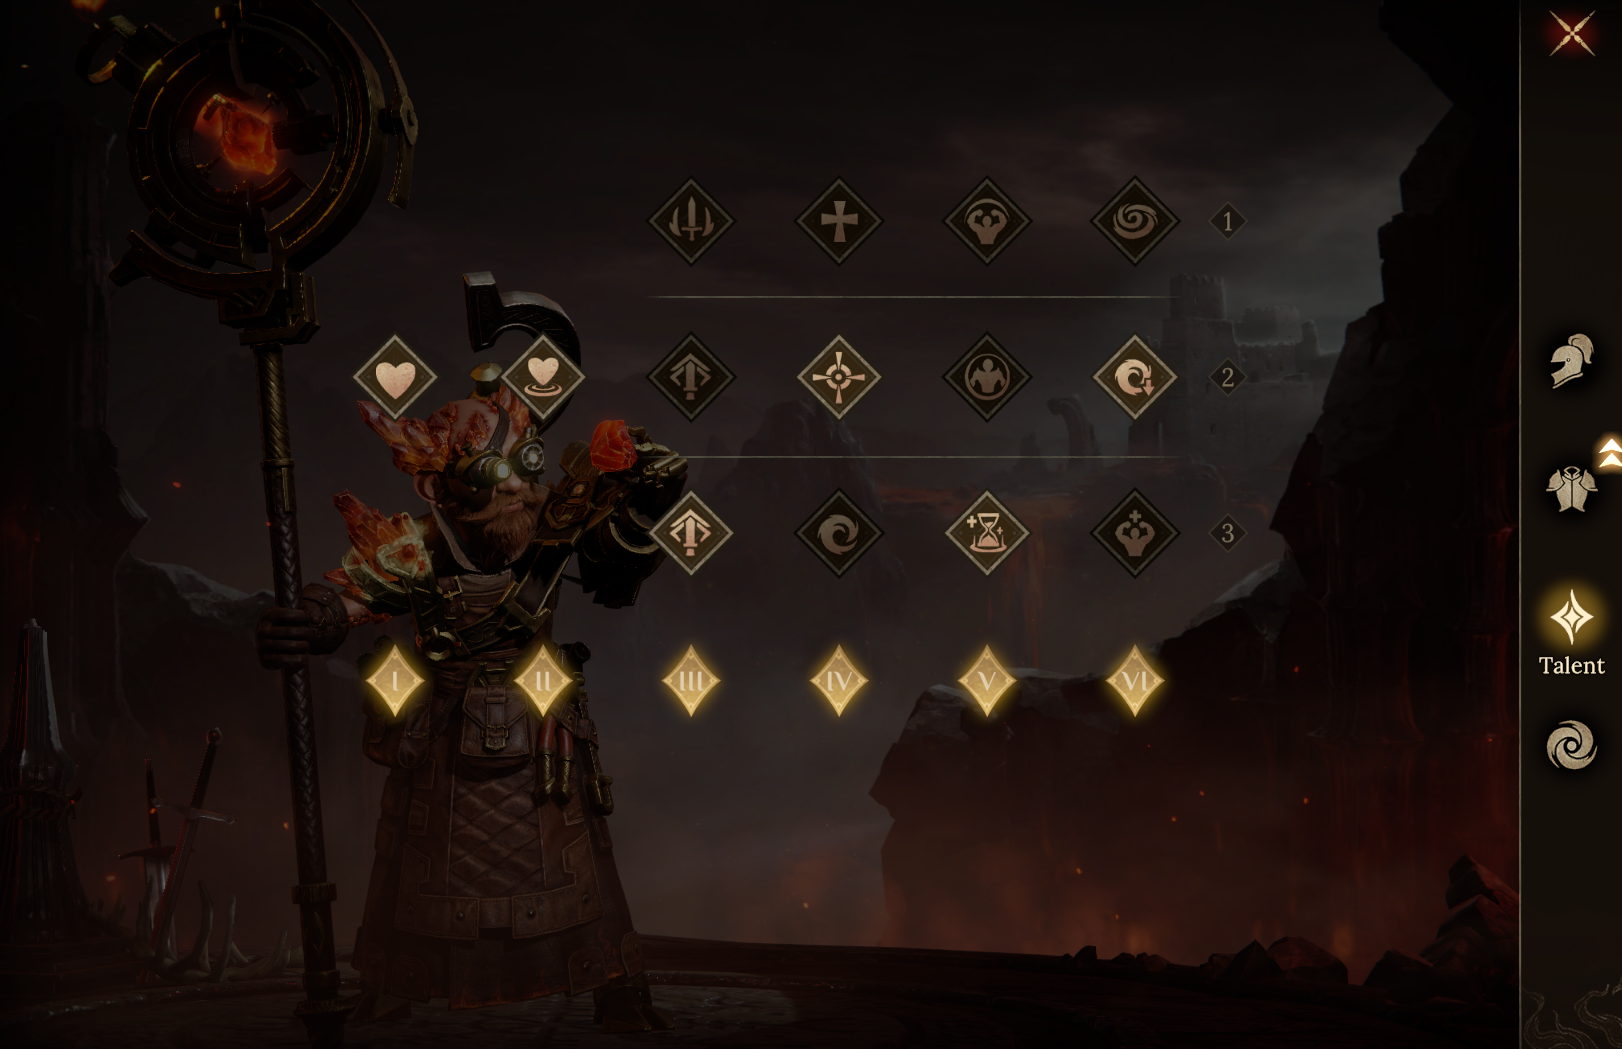
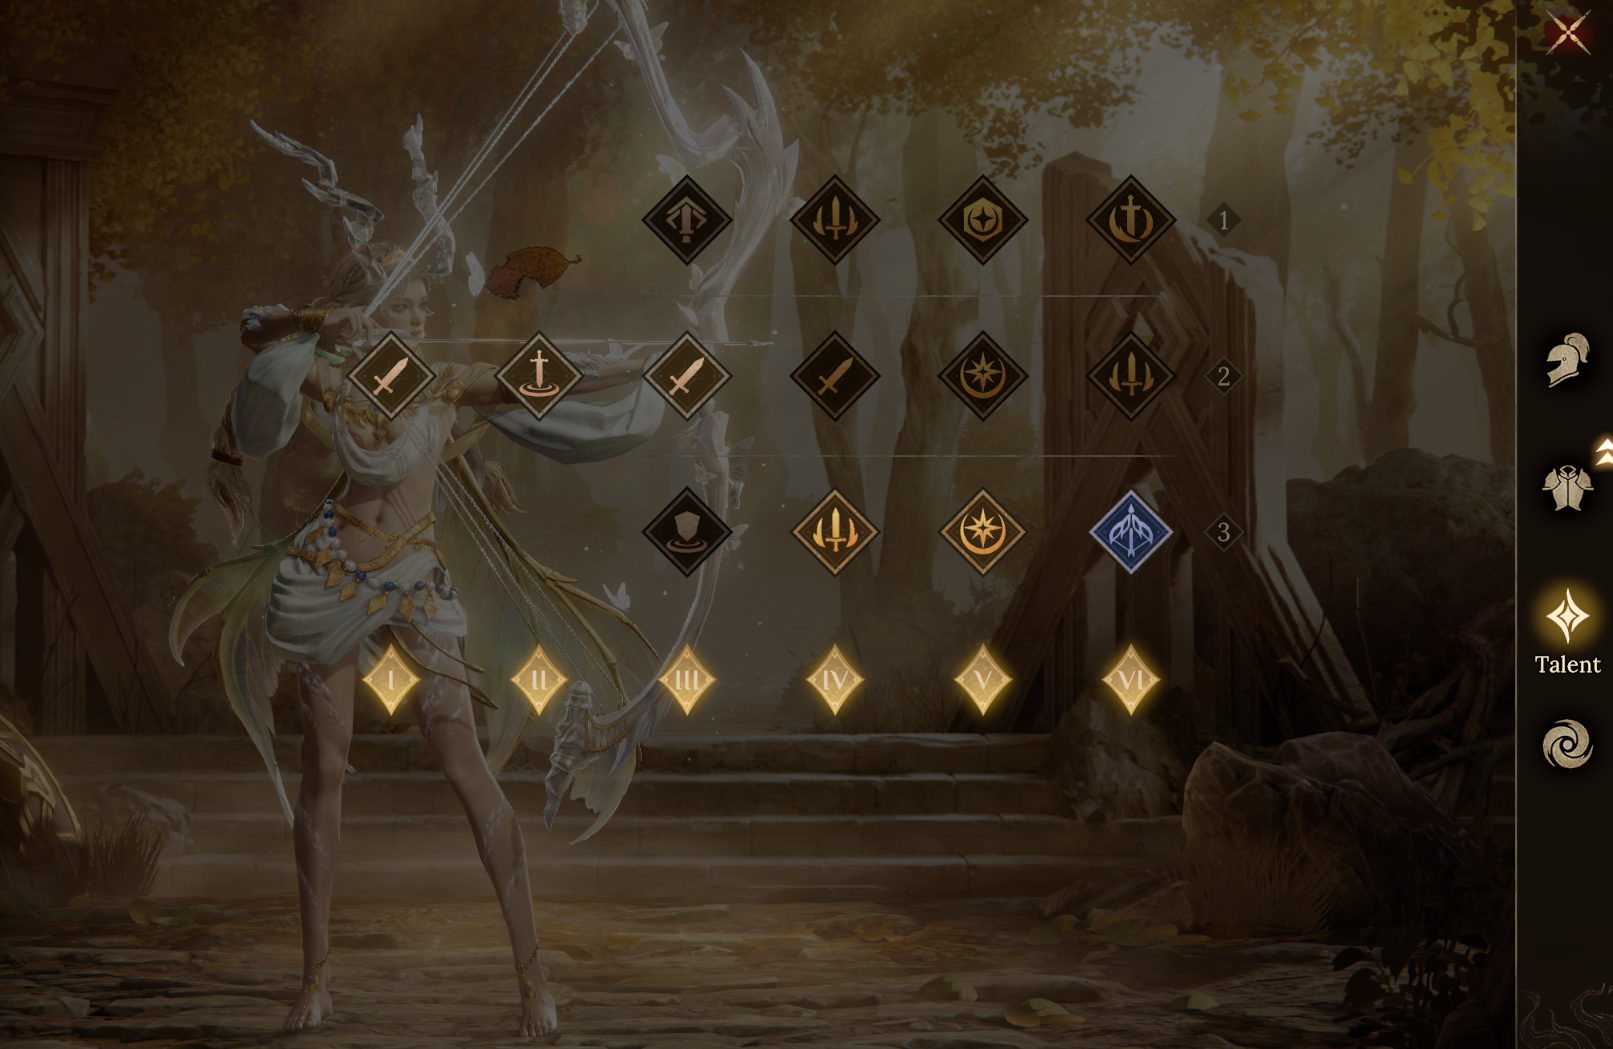
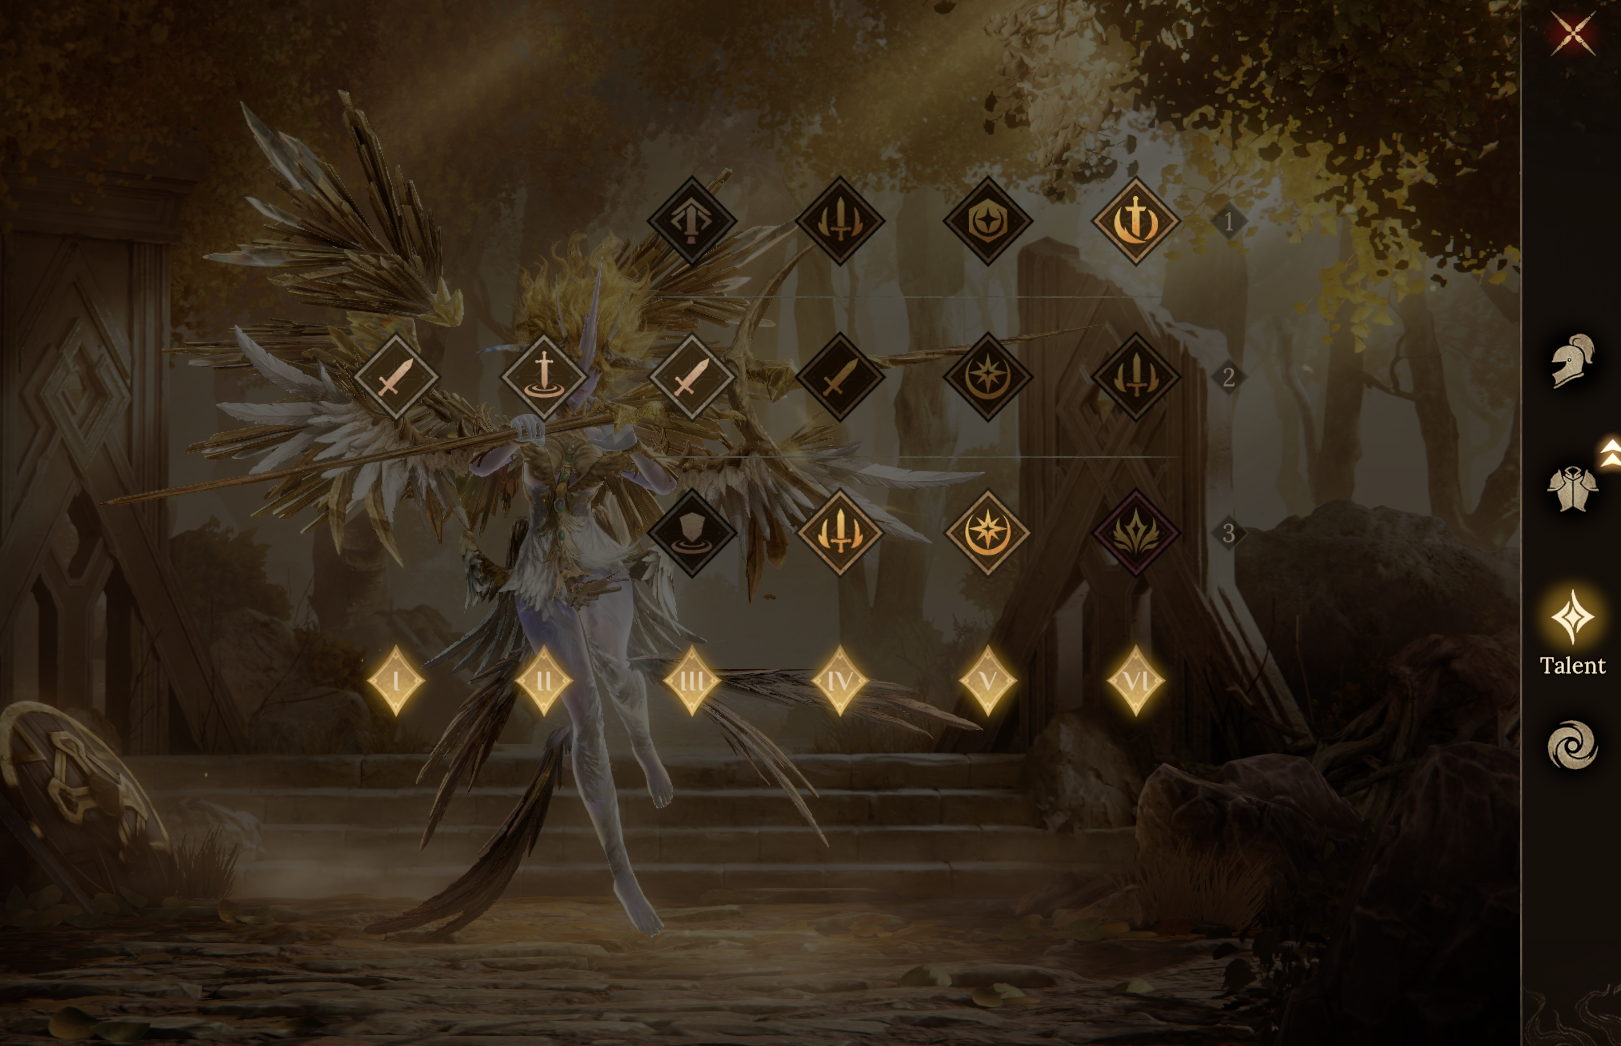
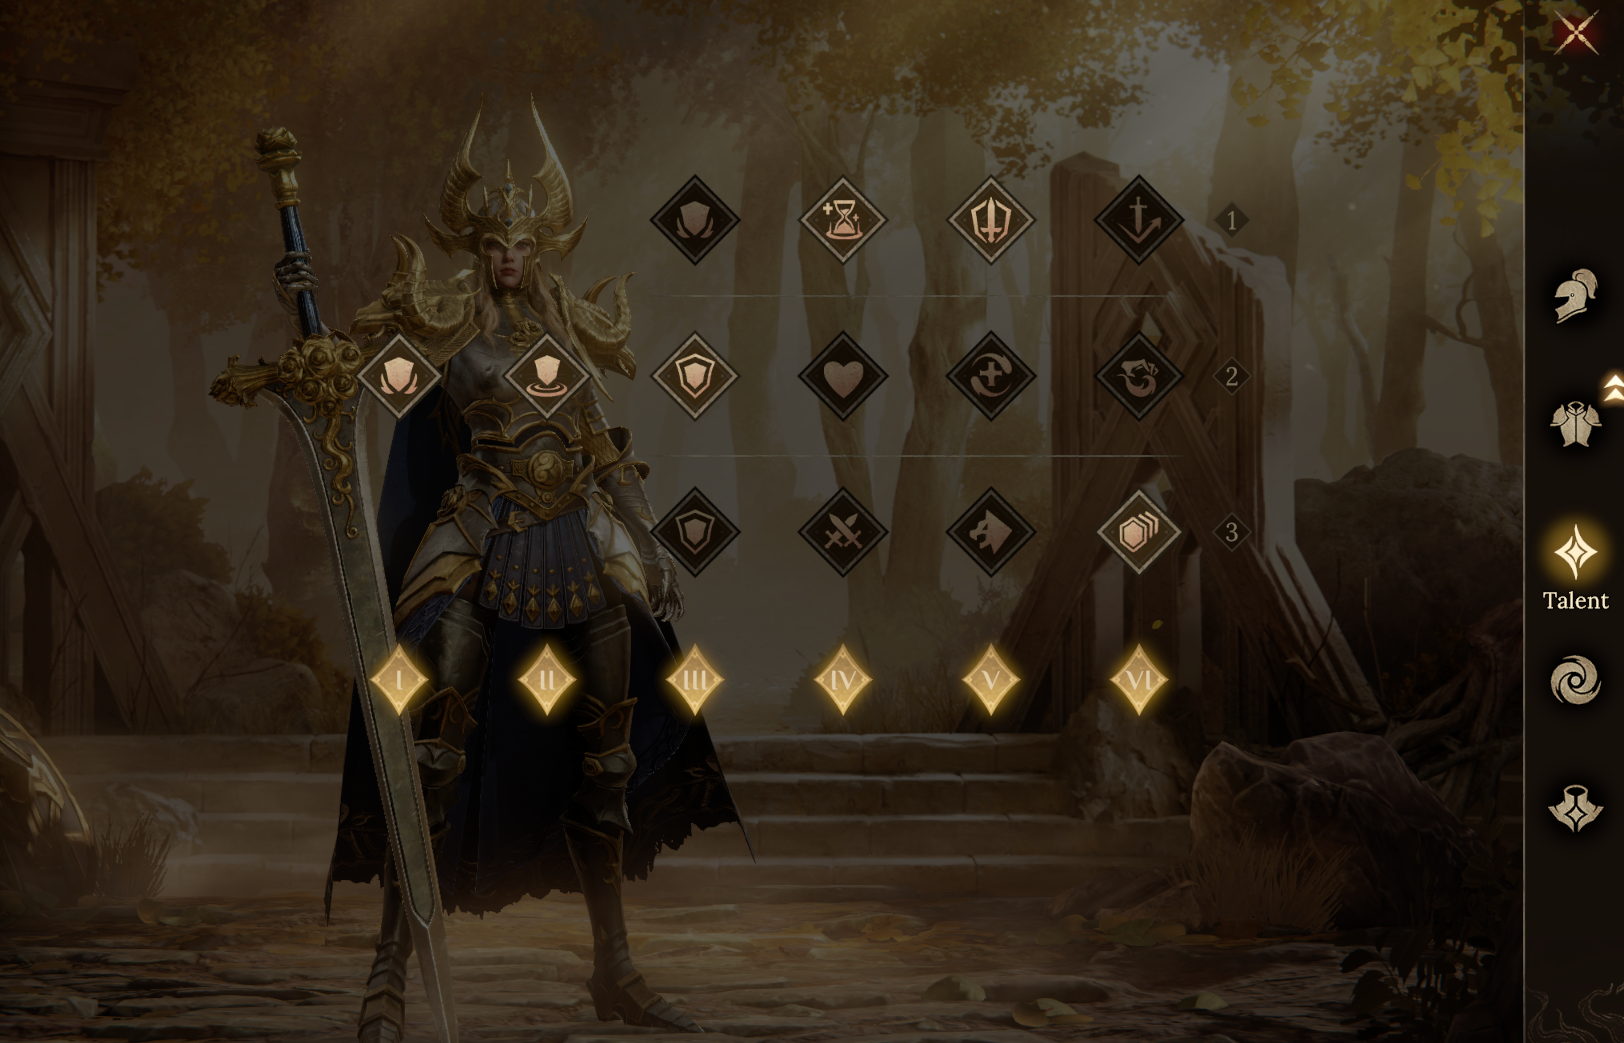
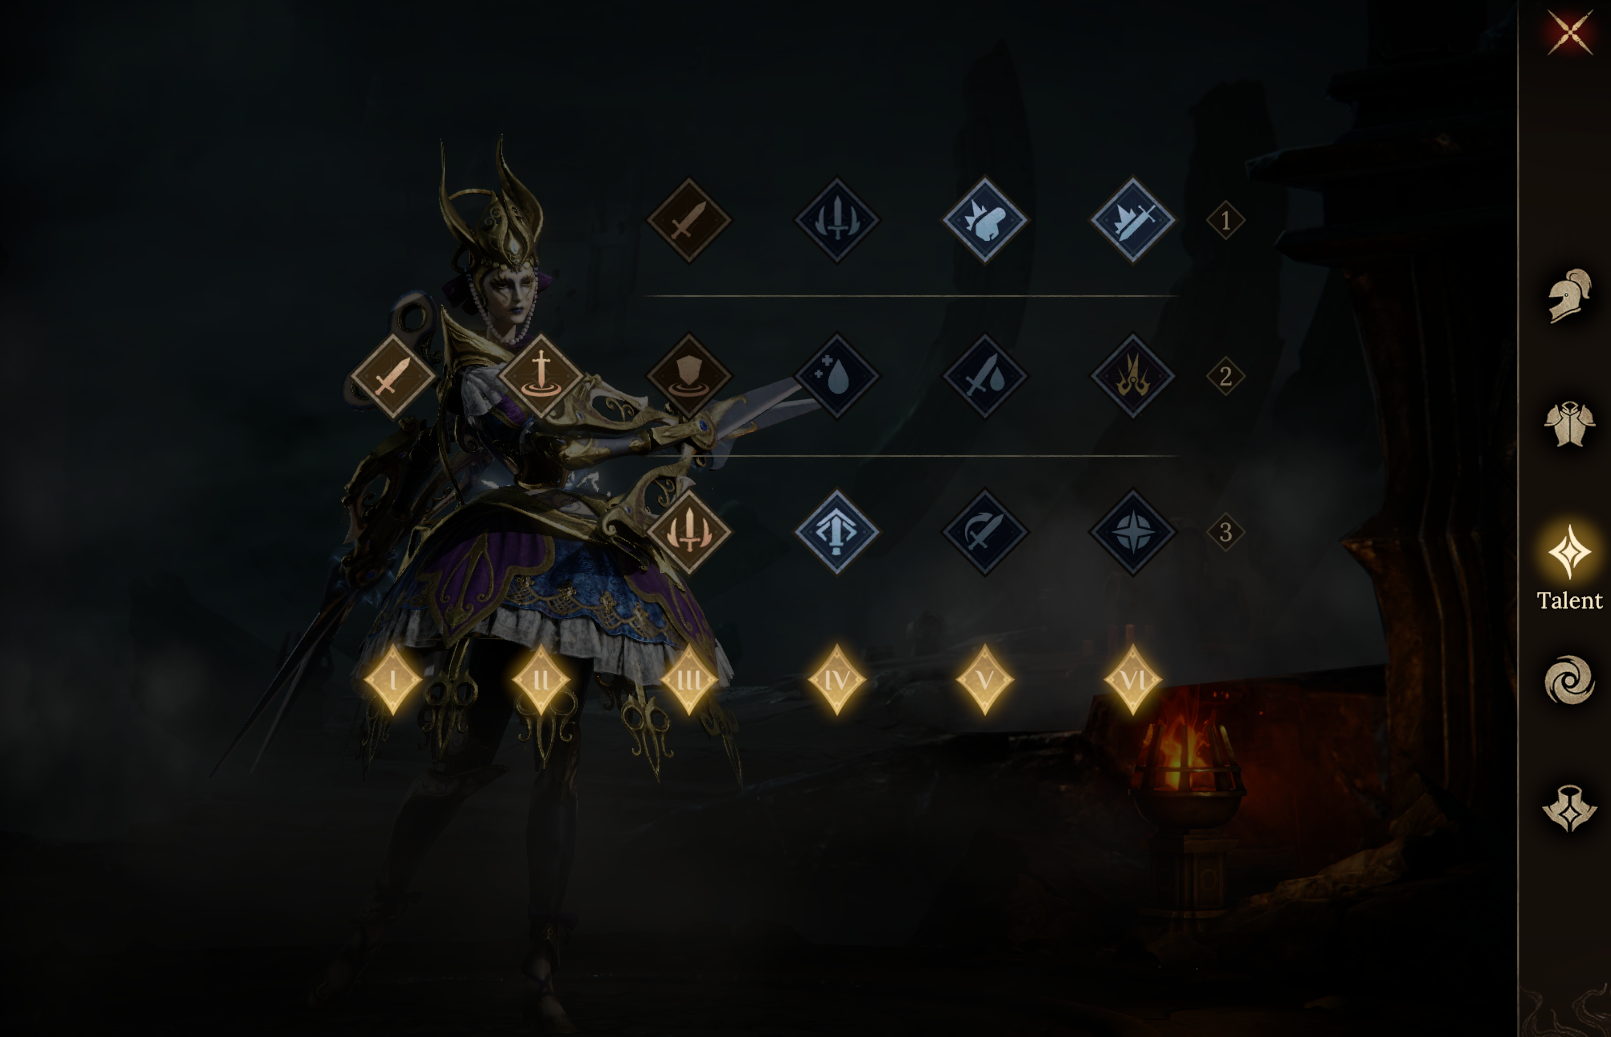
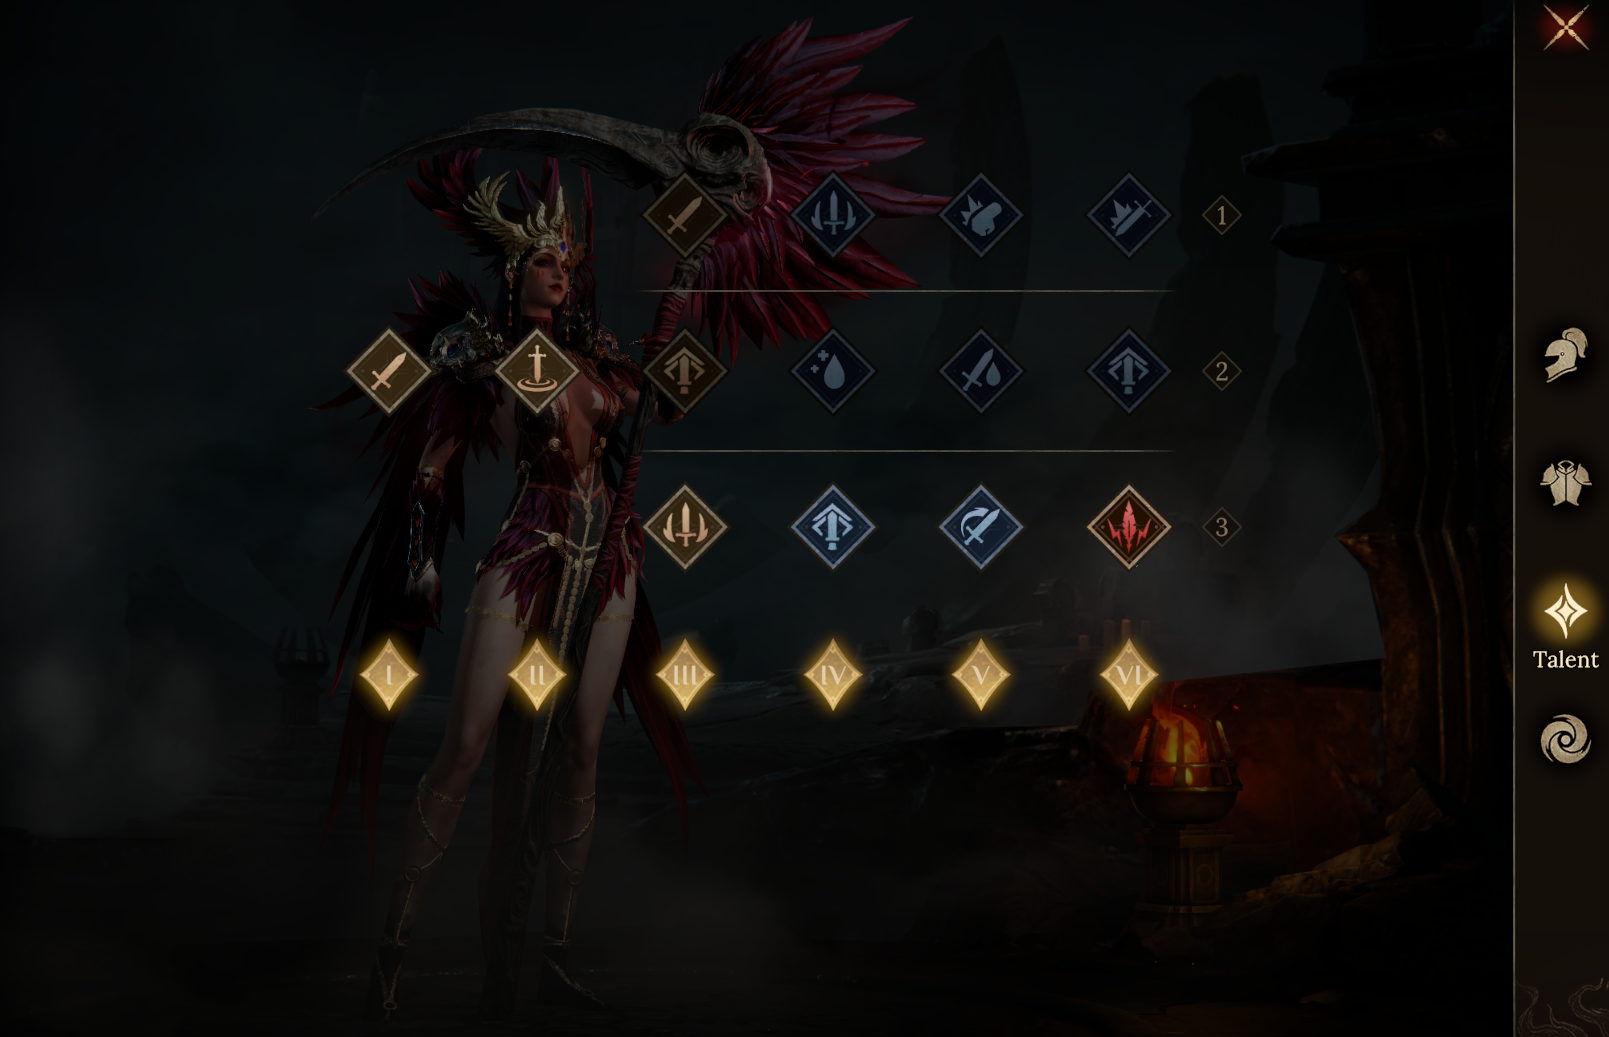
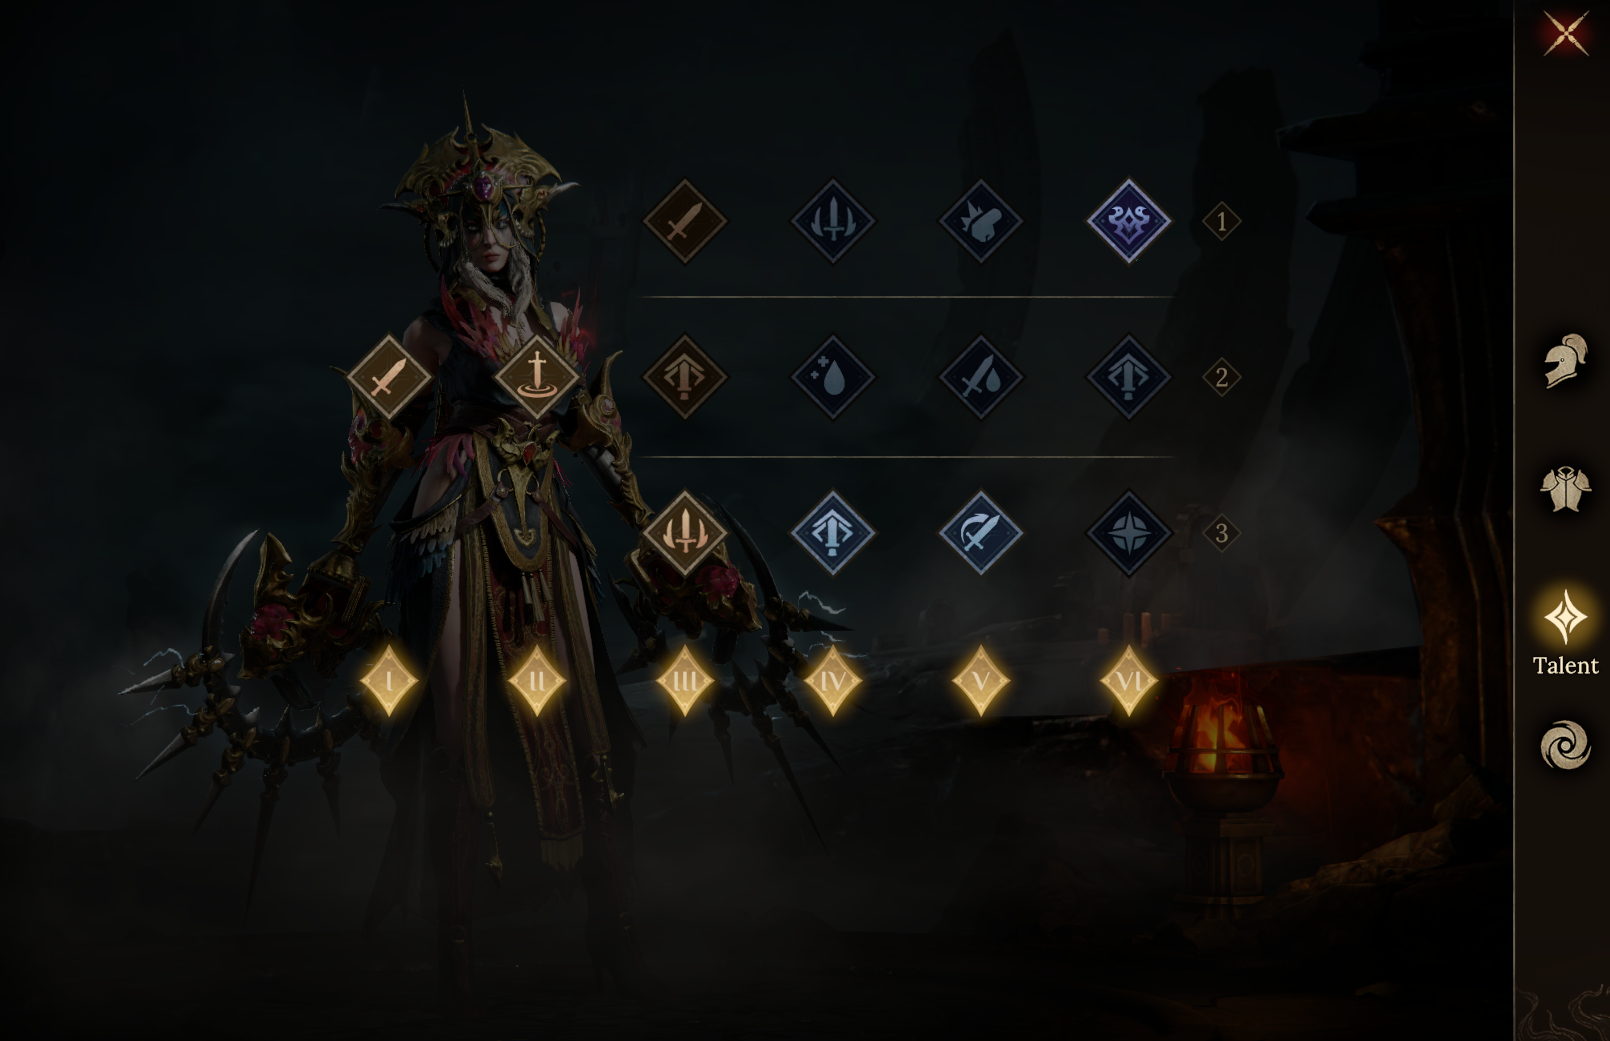
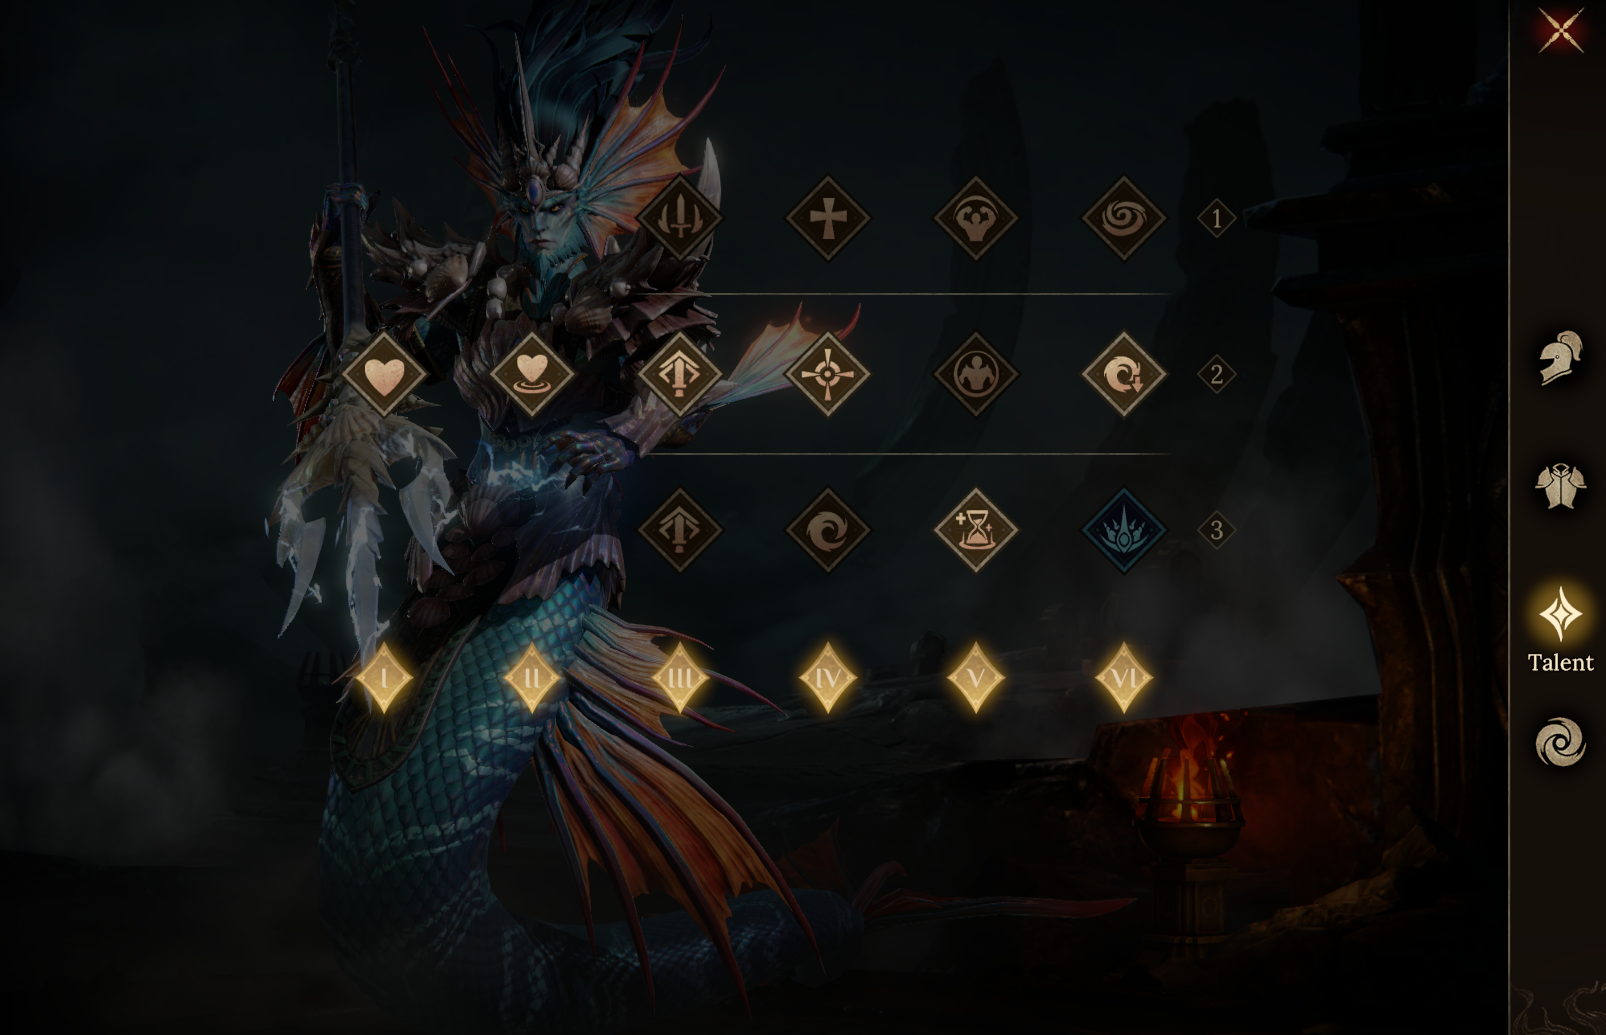
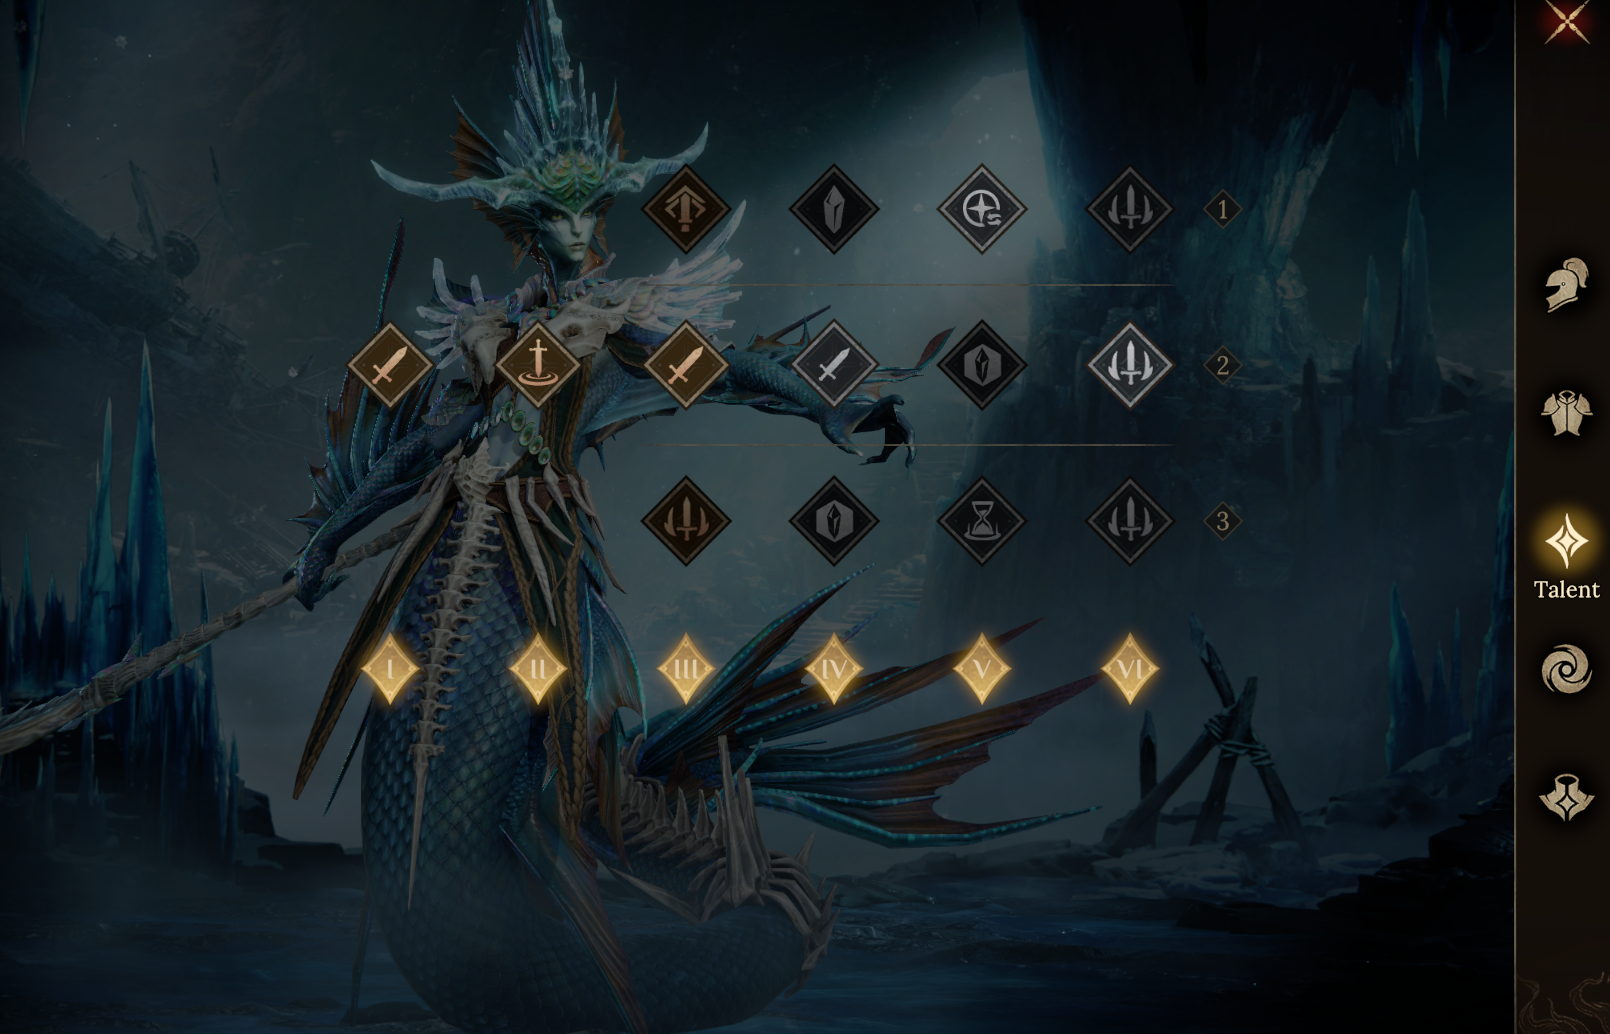
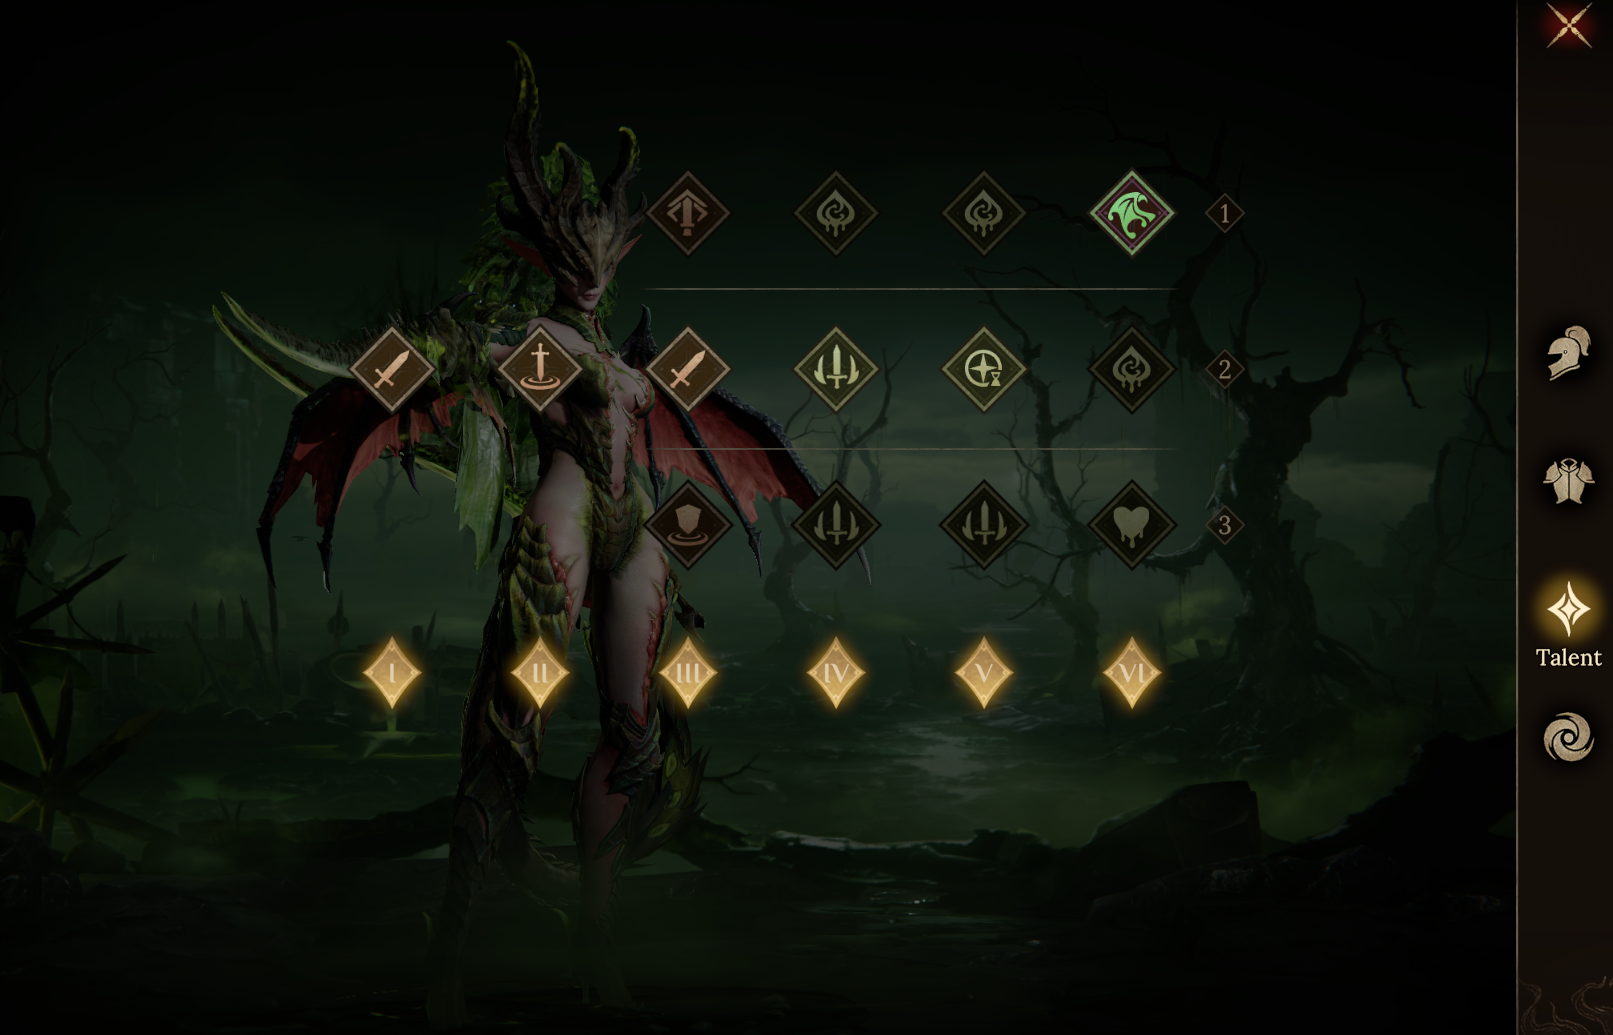
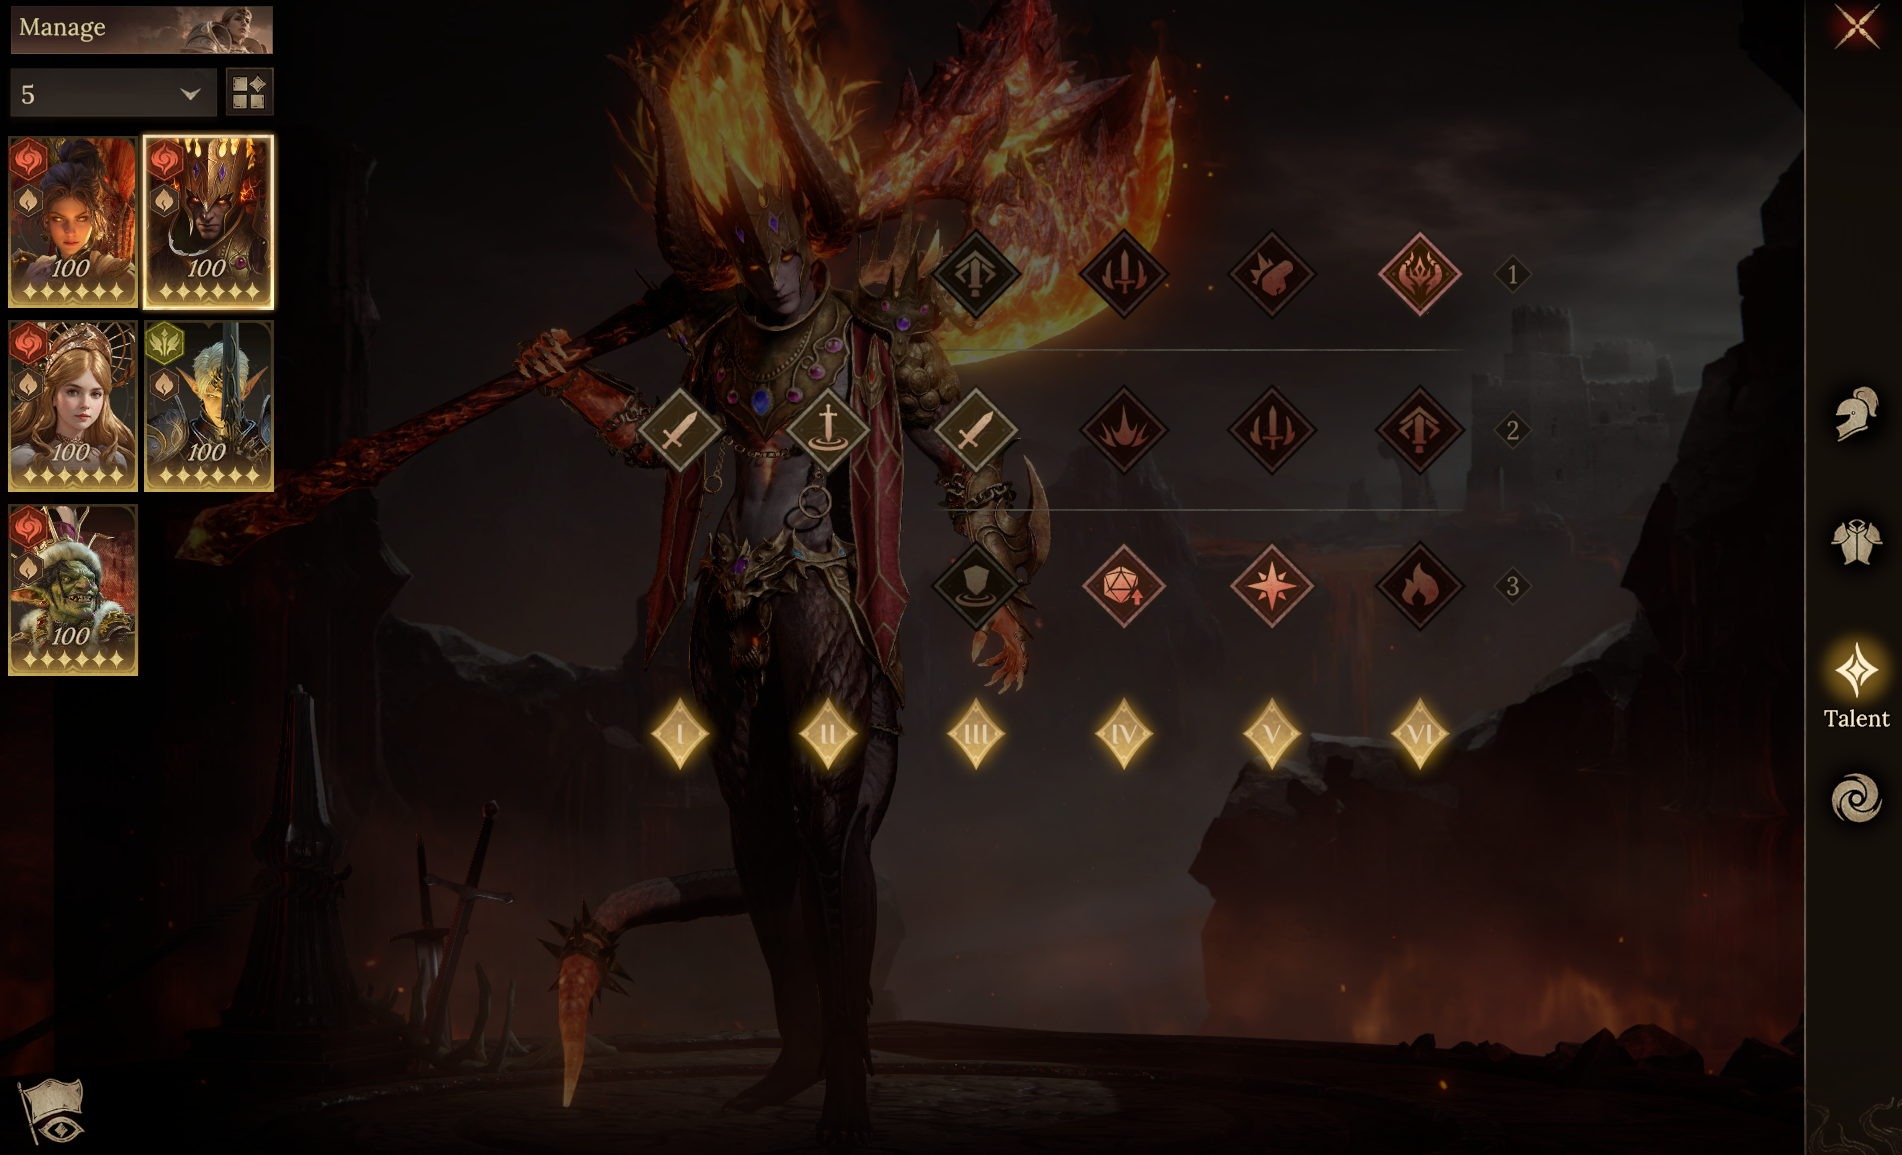
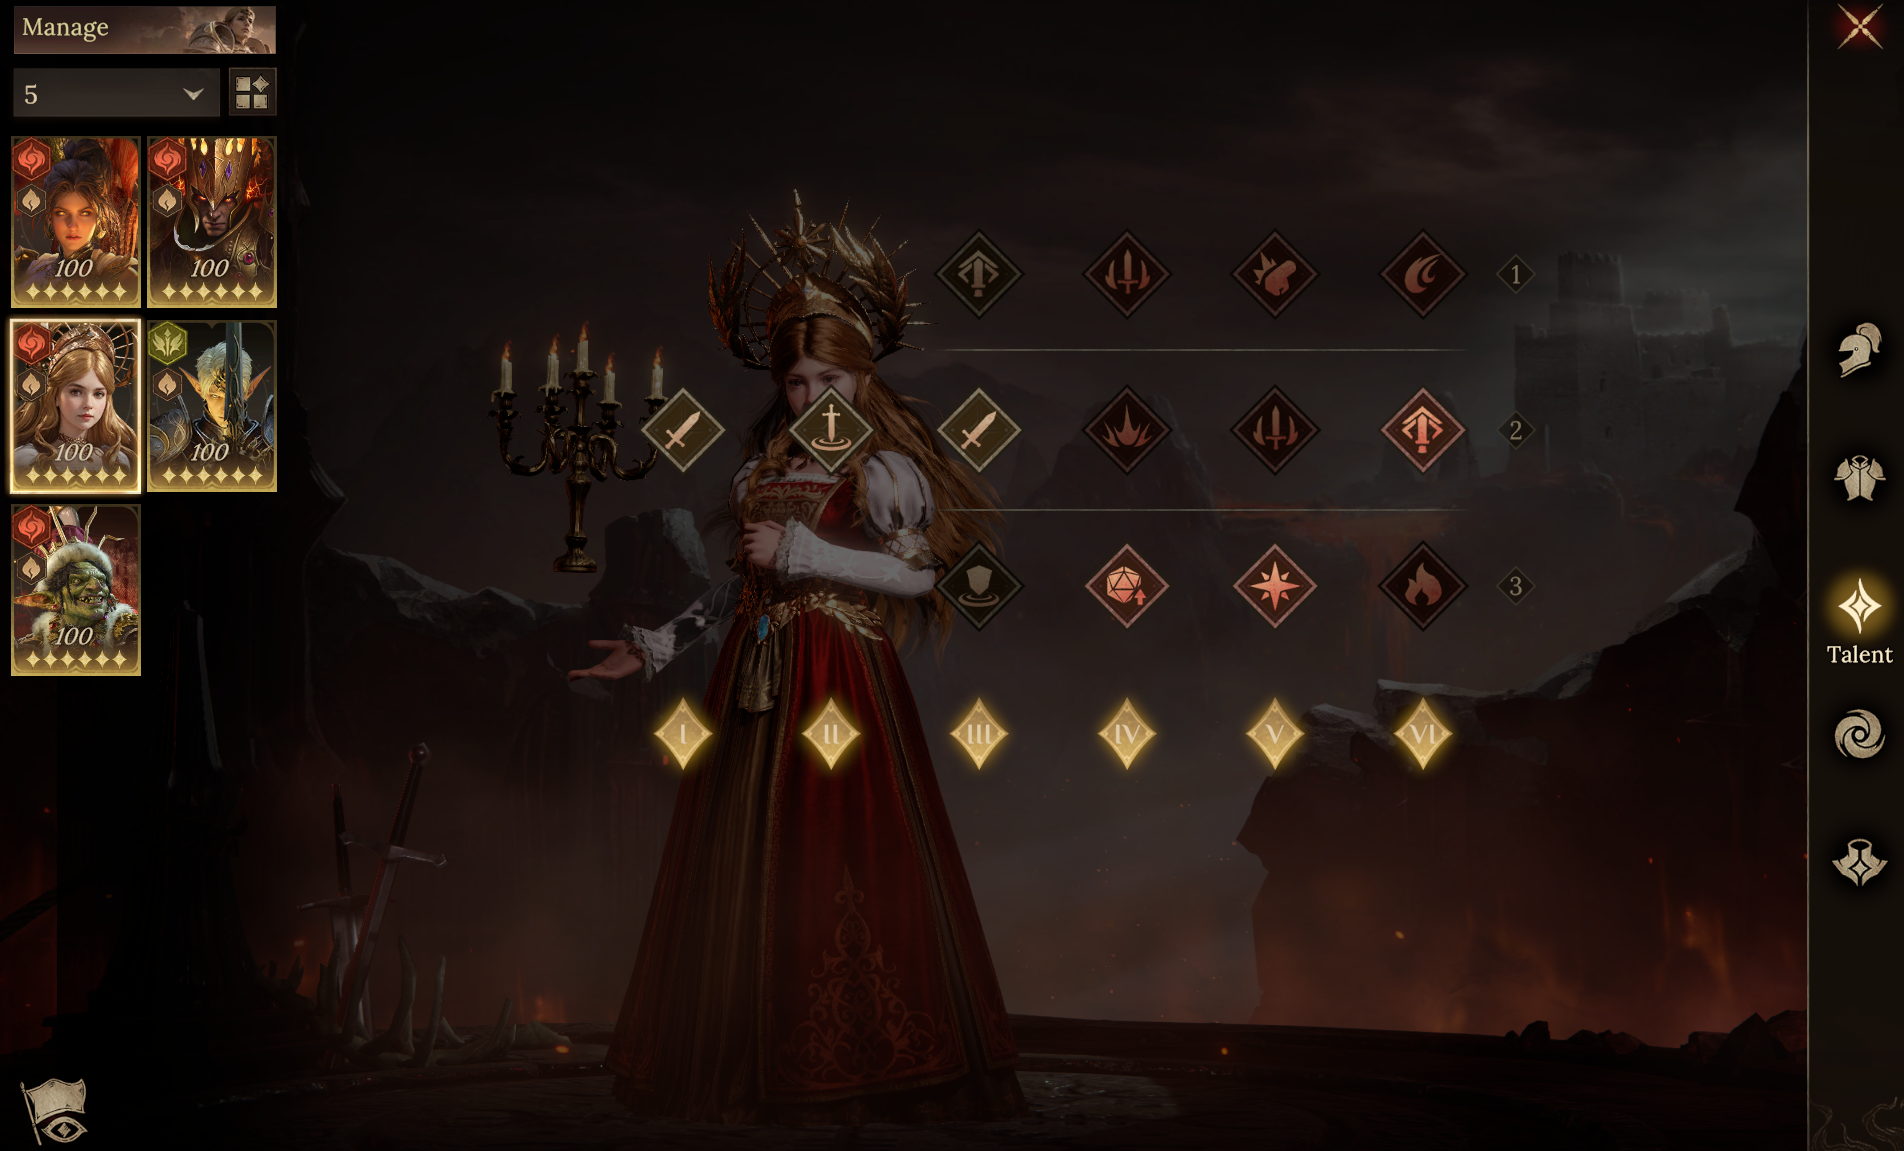
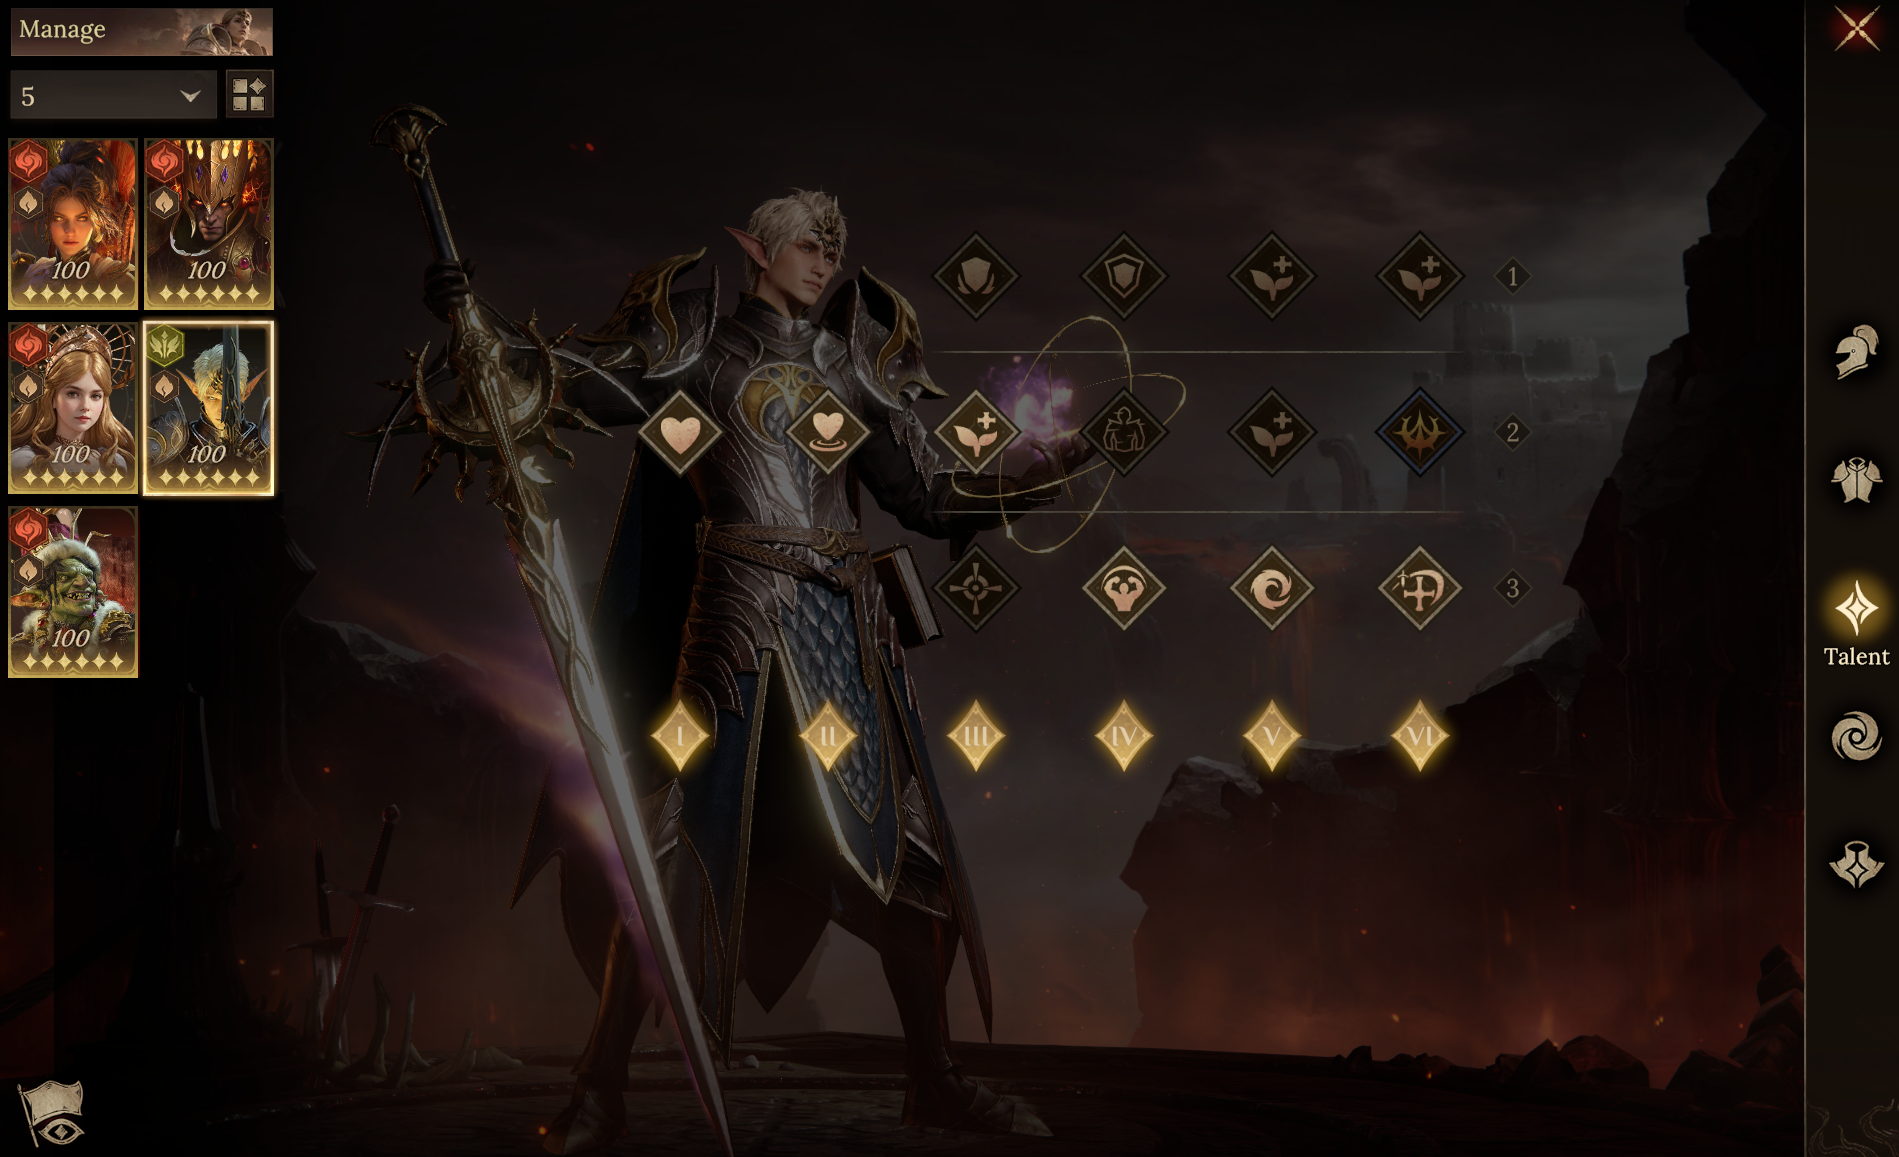
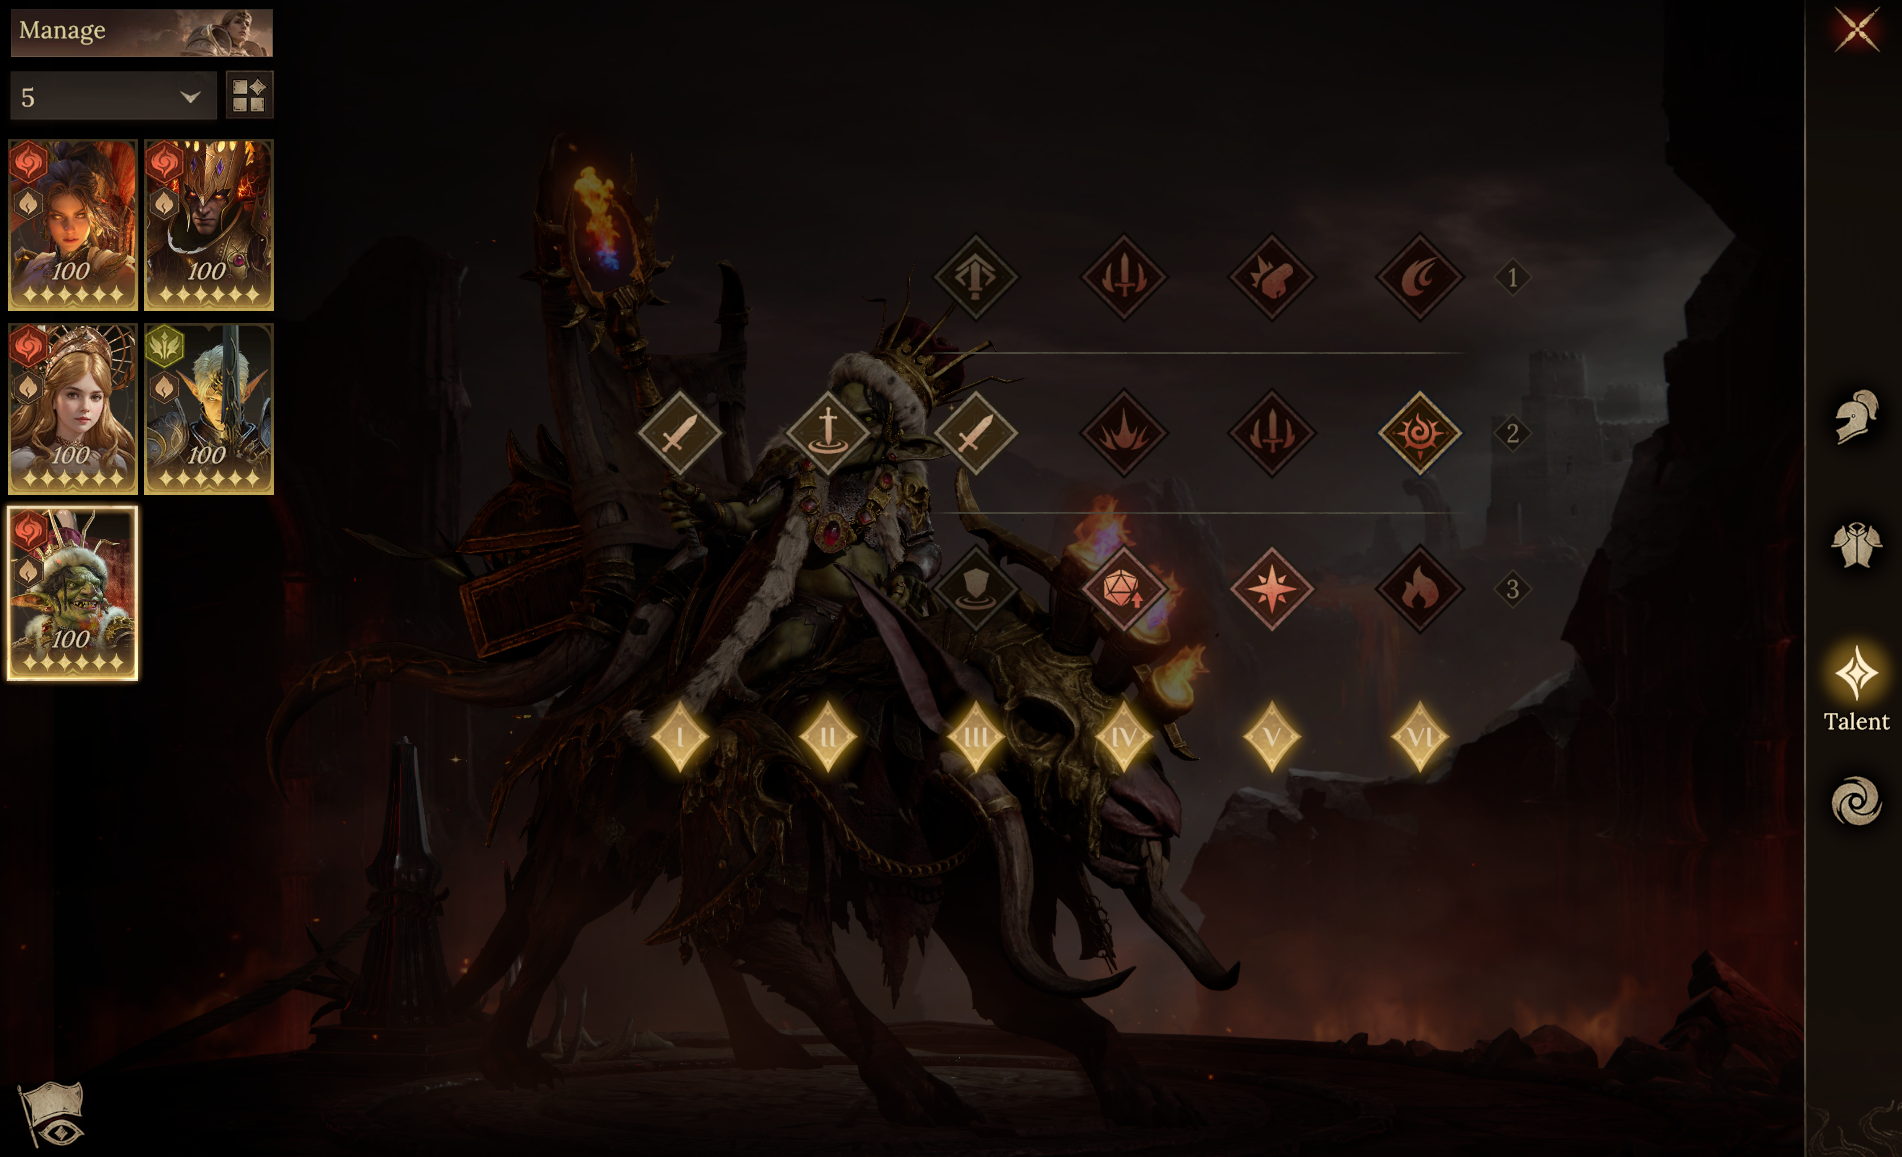
●Talent Reference
[Joyce]Team Composition: Acilia + Talethia + Diantha + Lincos + Anneliesis
●Team Aura/Familiar
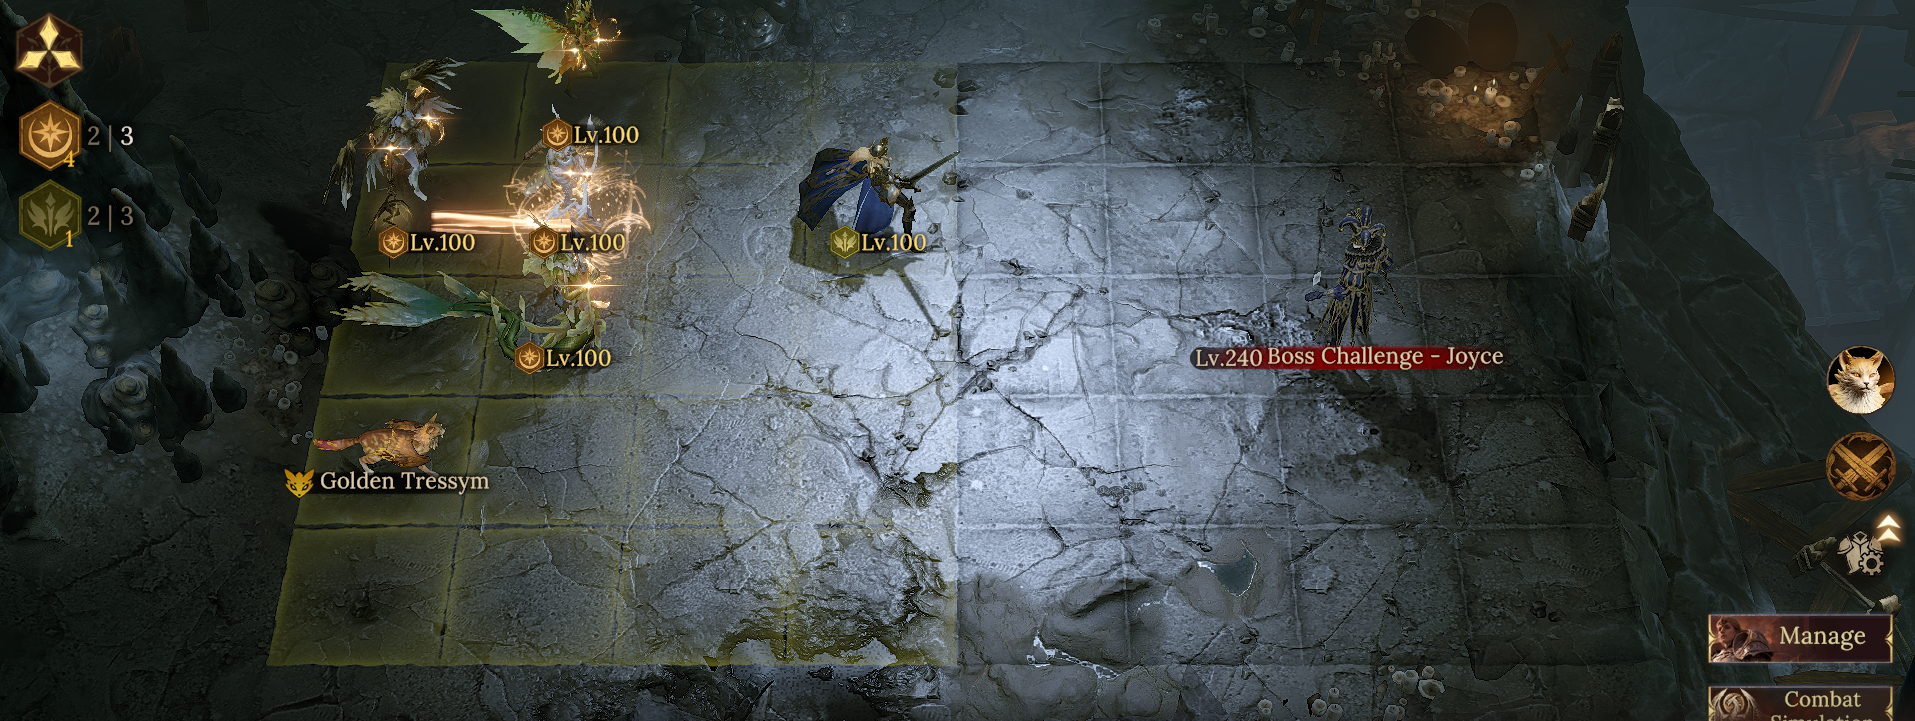
Use Diantha's Attack Aura with the Tressym Familiar to maximize the team's damage output.
●Skill Timing Reference
●Notes
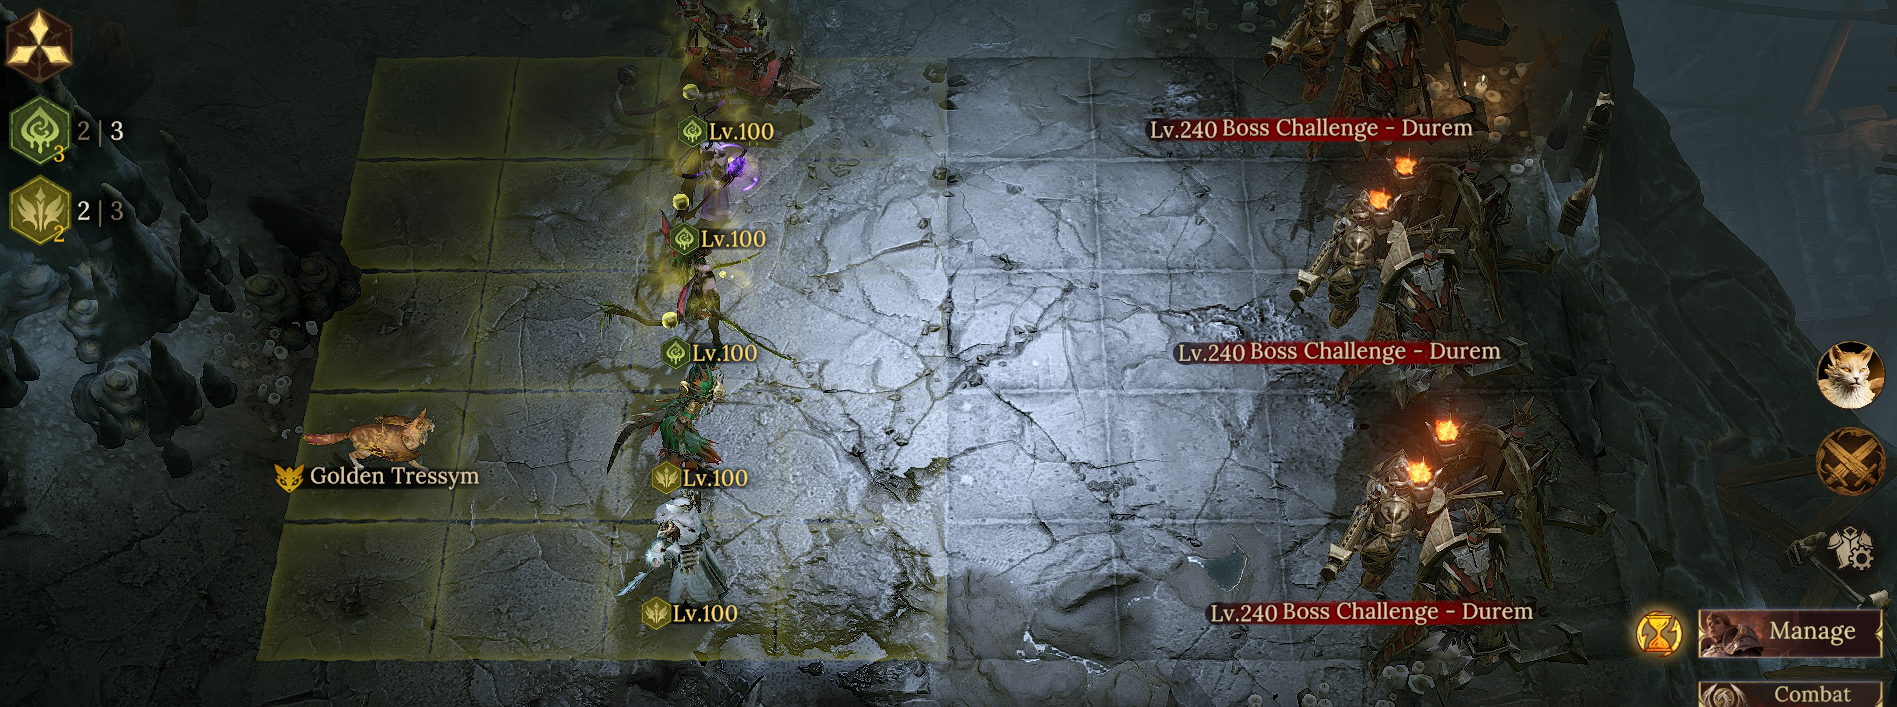
1. Use the positioning shown as reference so the boss and its clones are all within range of your team's skills. Acilia can also be replaced with heroes such as Rena, Naro, or Scaarr.
2. Ensure Talethia's Attack is second only to Lincos's after entering battle, making her the target of Lincos's passive skill and ultimate skill.
●Hero Replacement Reference

Healing
|

Healing, Shield
Dispel Buffs
Boost Ally Stats
|

Main Forces Damage Output
|

Increase Ally Damage Output
Restore Aura Energy
|
Increase Ally Damage Output
Restore Aura Energy
|
| Replacement Reference |

Healing
|

Healing
Dispel Buffs
Buff Prohibition
|

Main Forces Damage Output
|

Increase Ally Damage Output
Restore Aura Energy
|
Increase Ally Damage Output
Restore Aura Energy
|
Build Reference●Key Attribute Requirements
This stage requires Anneliesis to dispel the boss's buffs
Therefore, Anneliesis and Diantha both require Accuracy > 260;
Use rune secondary attributes to stack Anneliesis's Skill Haste as high as possible
●Gear Reference
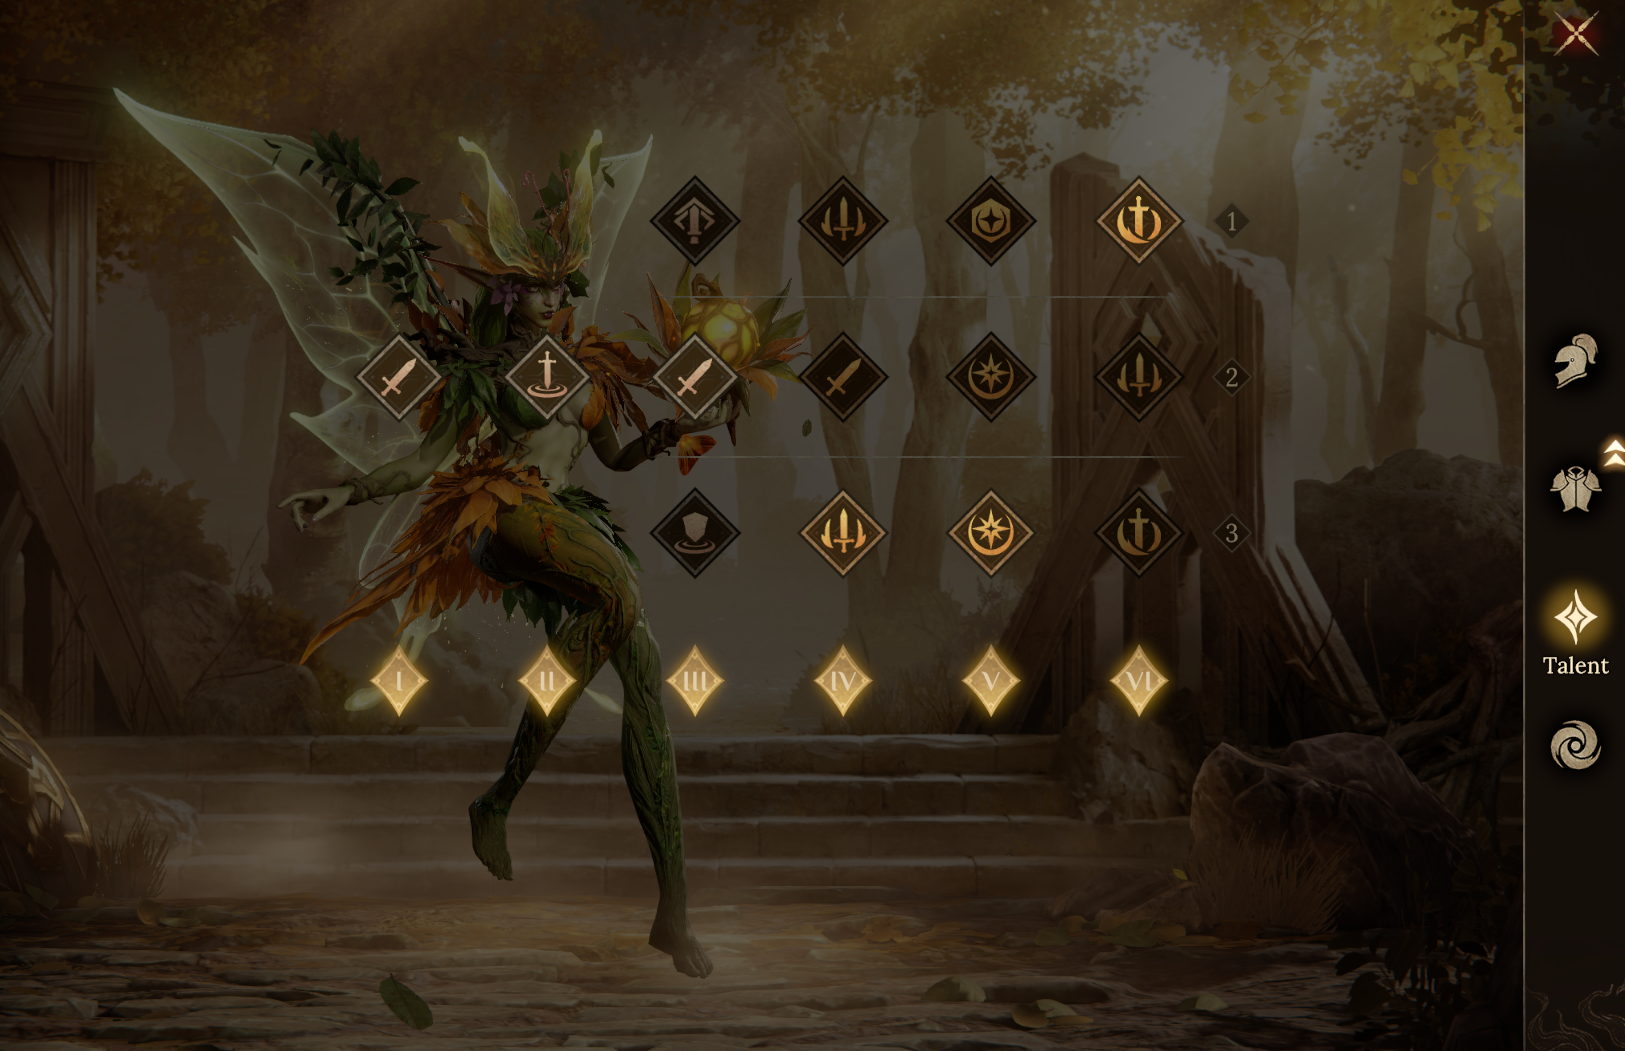
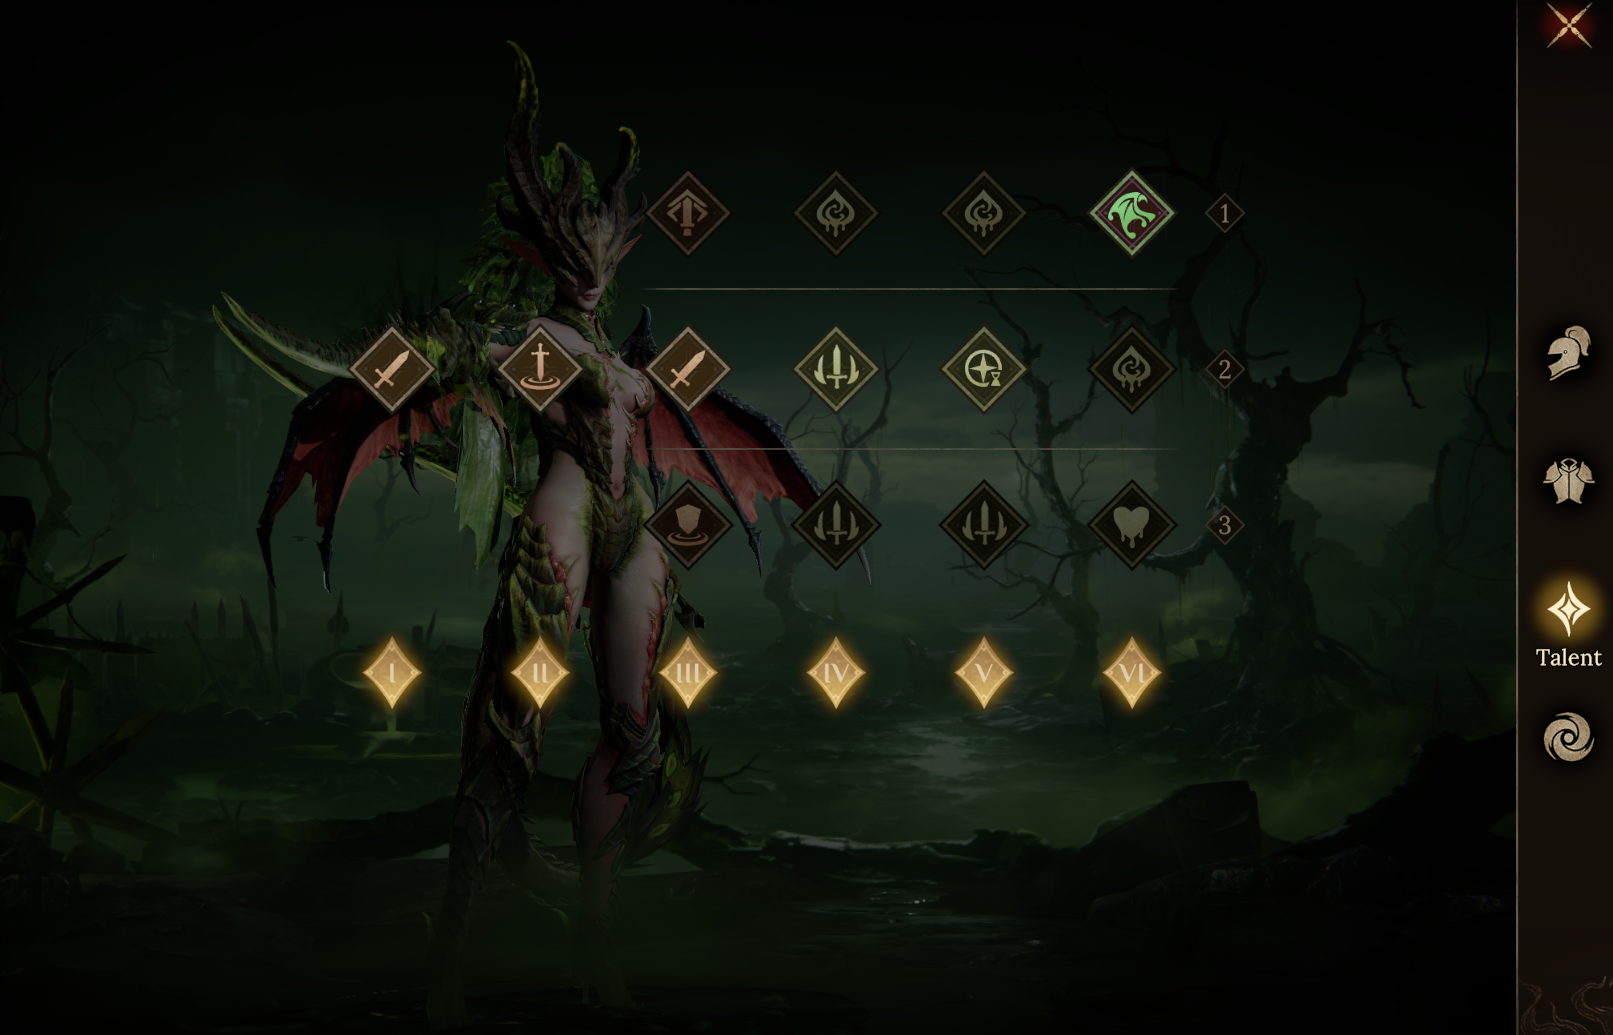
●Talent Reference
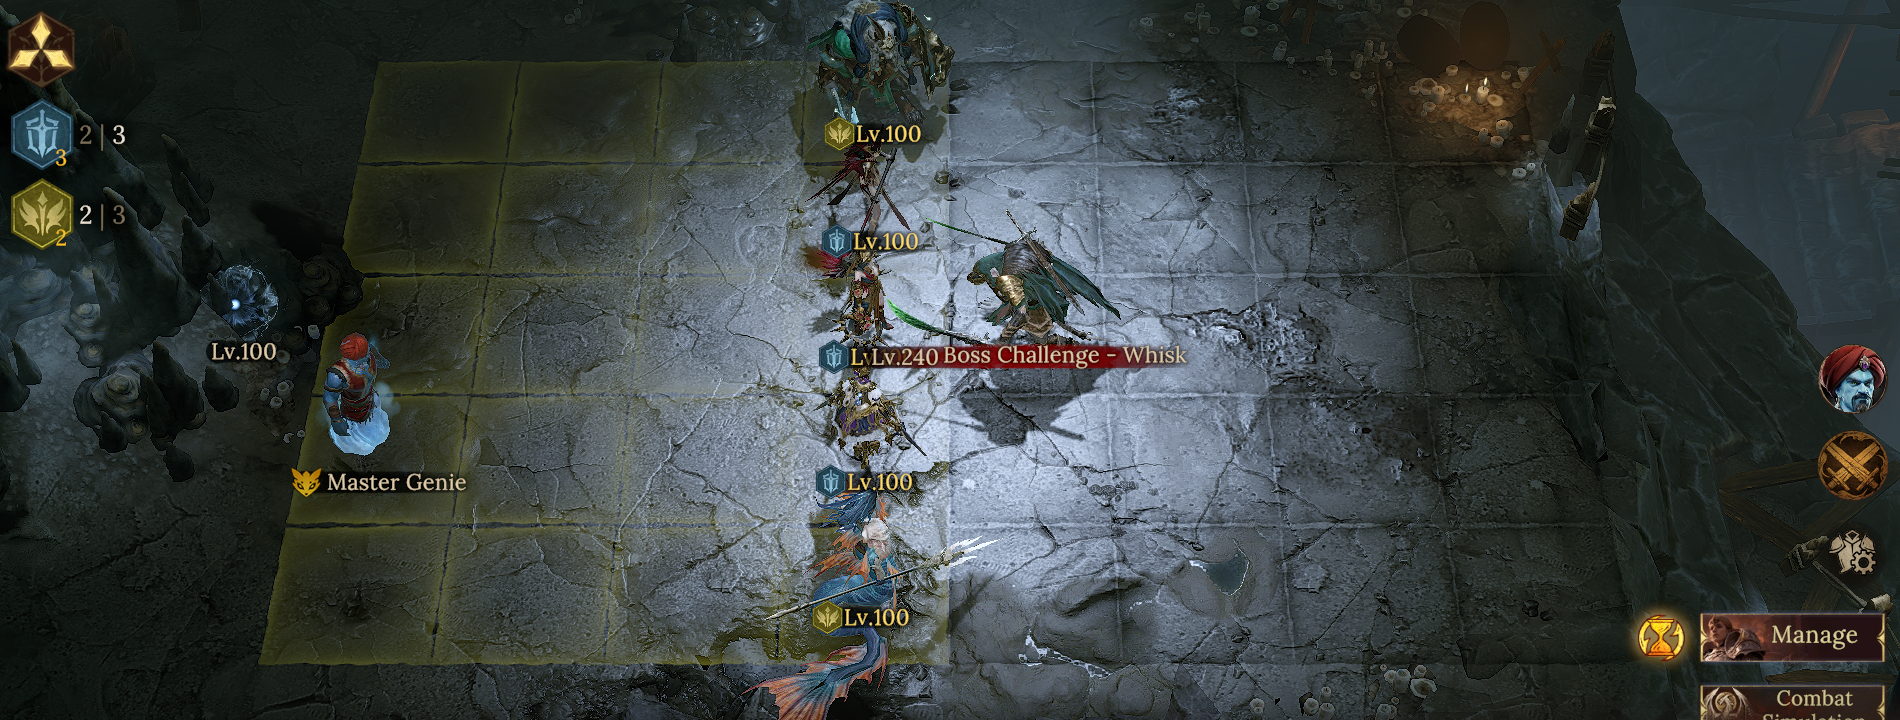
[Whisk]Team Composition: Maashtur + Fathomdown + Guinavivre + Nastjenka + Kurvida
●Team Aura/Familiar
Use Nastjenka's Attack Aura with the Starshade Servitor/Djinn Familiar to maximize the team's damage output.
●Skill Timing Reference
●Notes
1. Position as shown so Guinavivre can fully benefit from the Defense Ignore provided by Converging Flames, and gain the stat bonuses from Kurvida and Fathomdown equipped with Everlasting Candleflame and Whirling Edge;
2.Fathomdown and Kurvida should stack as much Attack as possible after meeting the Accuracy requirement, increasing the stats shared with Guinavivre by equipping Everlasting Candleflame;
3. This lineup uses Fathomdown and Maashtur to frequently apply Ultimate Down, reducing the boss's skill-cast frequency. Travelers without Maashtur can replace him with Astaion
●Hero Replacement Reference

Healing, Shield
Inflict Multiple Debuffs
Provide Multiple Buffs
|
Ultimate Down
Attack Penalty
Recharging Speed Penalty
|

Main Forces Damage Output
Attack Speed Up
|

High-Frequency Basic Attack
Increase Ally Damage Output
|

Main Forces Damage Output
Combo Attack
|
| Replacement Reference |
Healing, Shield
Defense Up
Dispel Buffs
|

Ultimate Down
Attack Penalty
|

Main Forces Damage Output
Combo Attack
|
Secondary Damage Output
High-Frequency Basic Attack
|

Secondary Damage Output
Increase Ally Attack Speed
|
Build Reference●Key Attribute Requirements
Maashtur, Fathomdown, and Kurvida: Accuracy > 260;
Fathomdown: stack Skill Haste as high as possible; Maashtur: around 40 Skill Haste is enough;
Use rune secondary attributes to stack Guinavivre's Attack Speed as high as possible
●Gear Reference
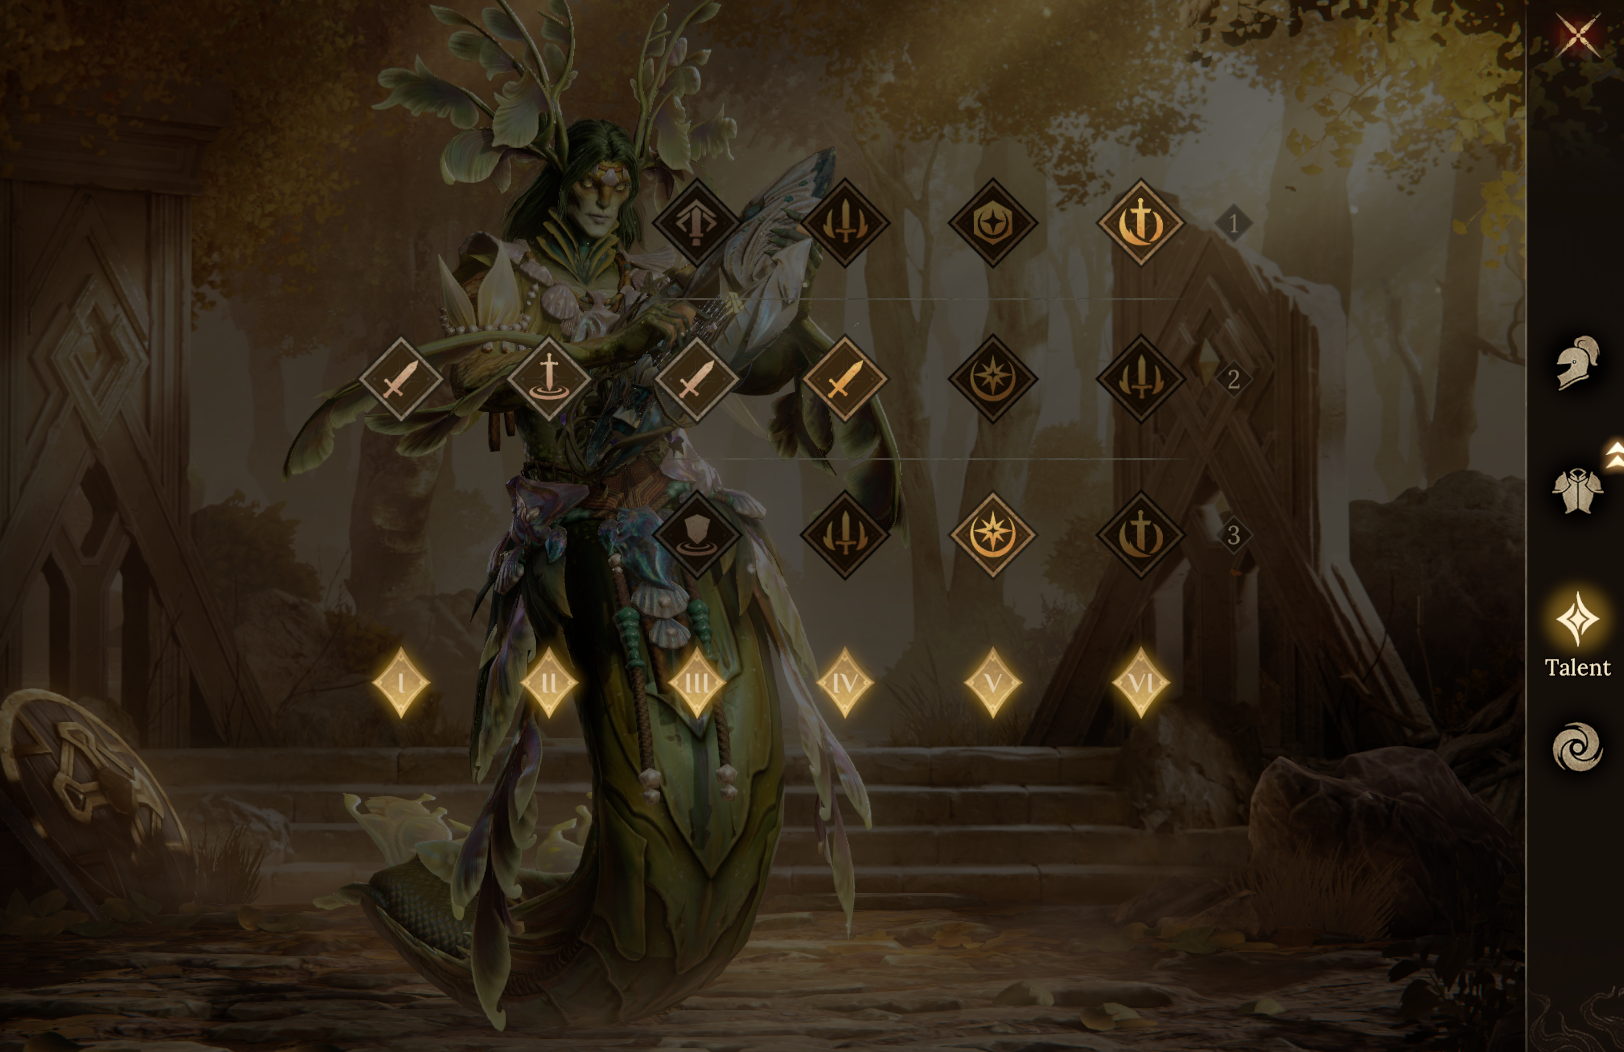
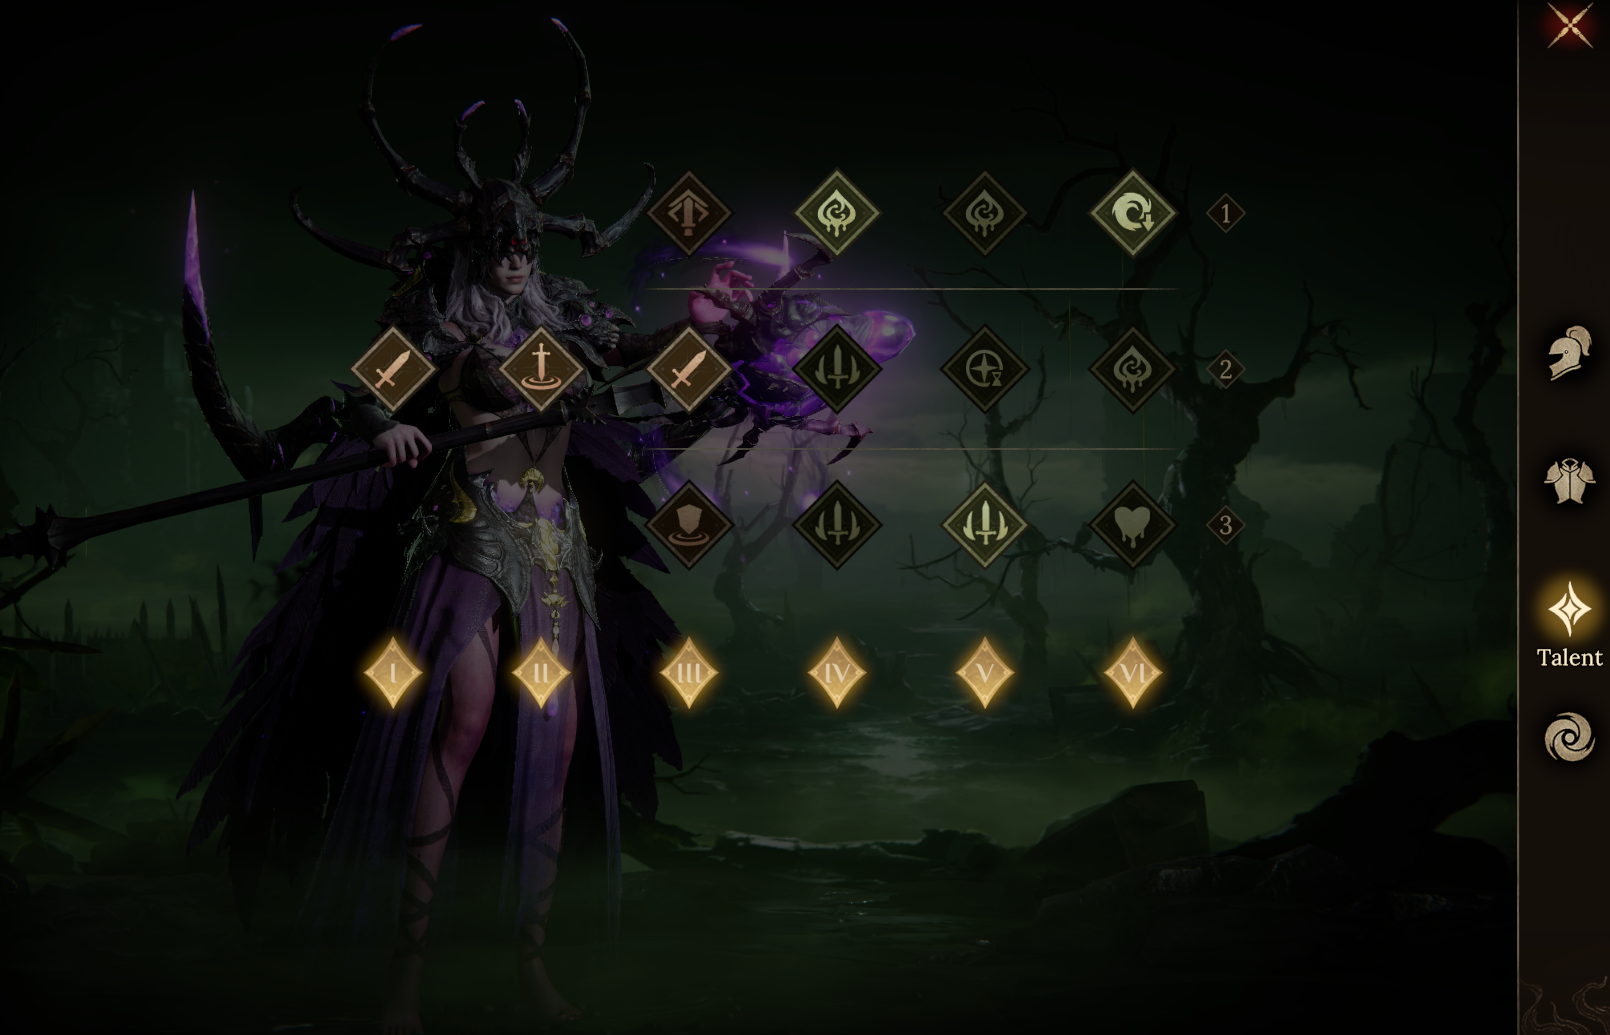
●Talent Reference
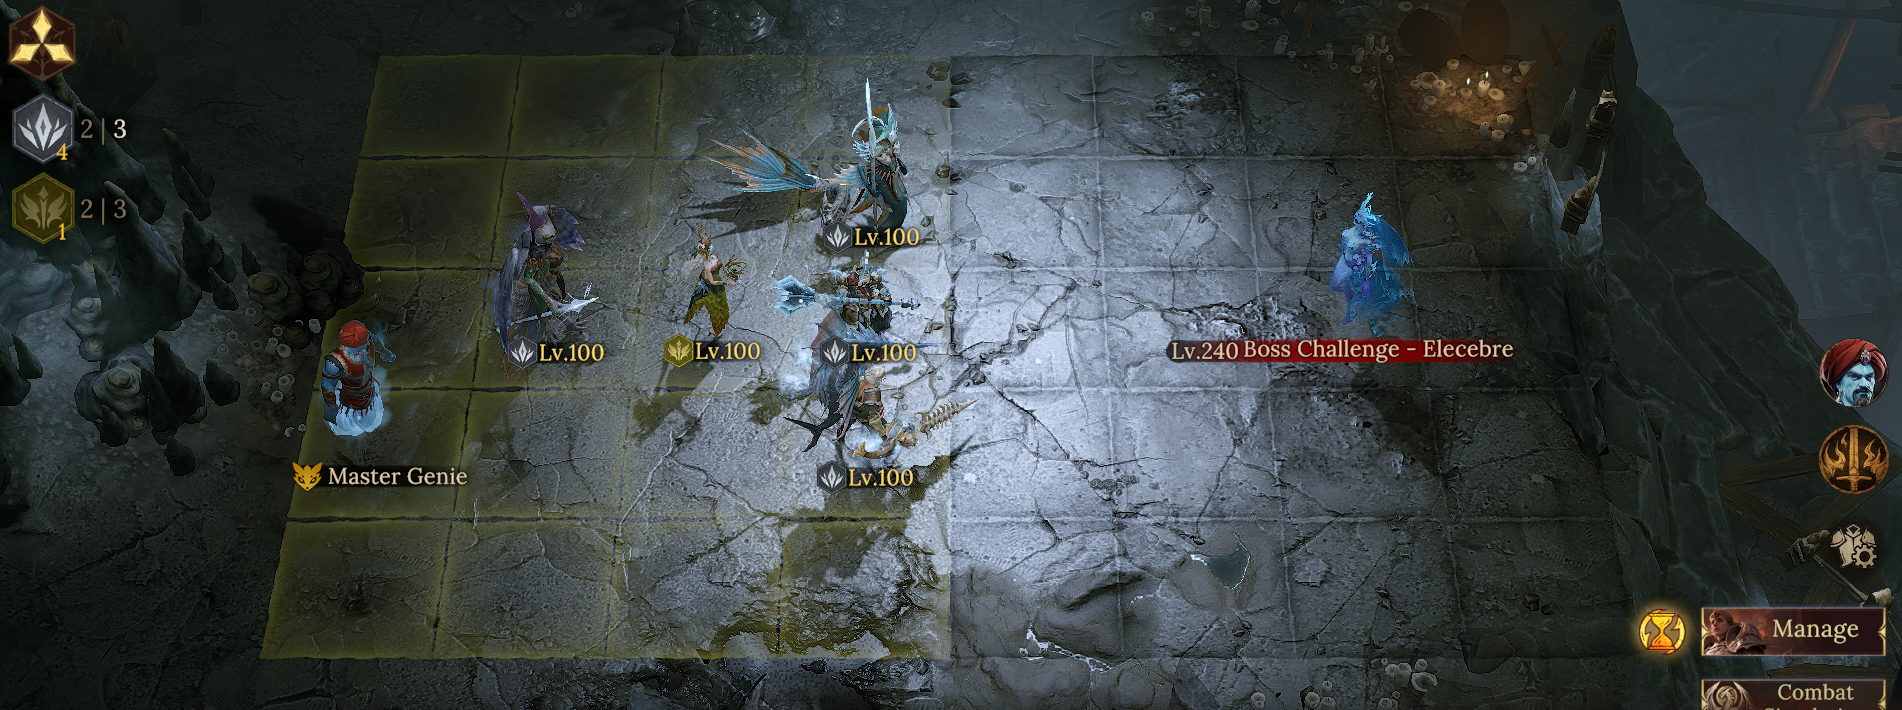
[Elecebre]Team Composition: Ernesto + Beldelle + Fredegonda + Shinnah + Felosia
●Team Aura/Familiar
Use Beldelle's Attack Aura with the Starshade Servitor or Stoneborn Familiar to maximize the team's damage output.
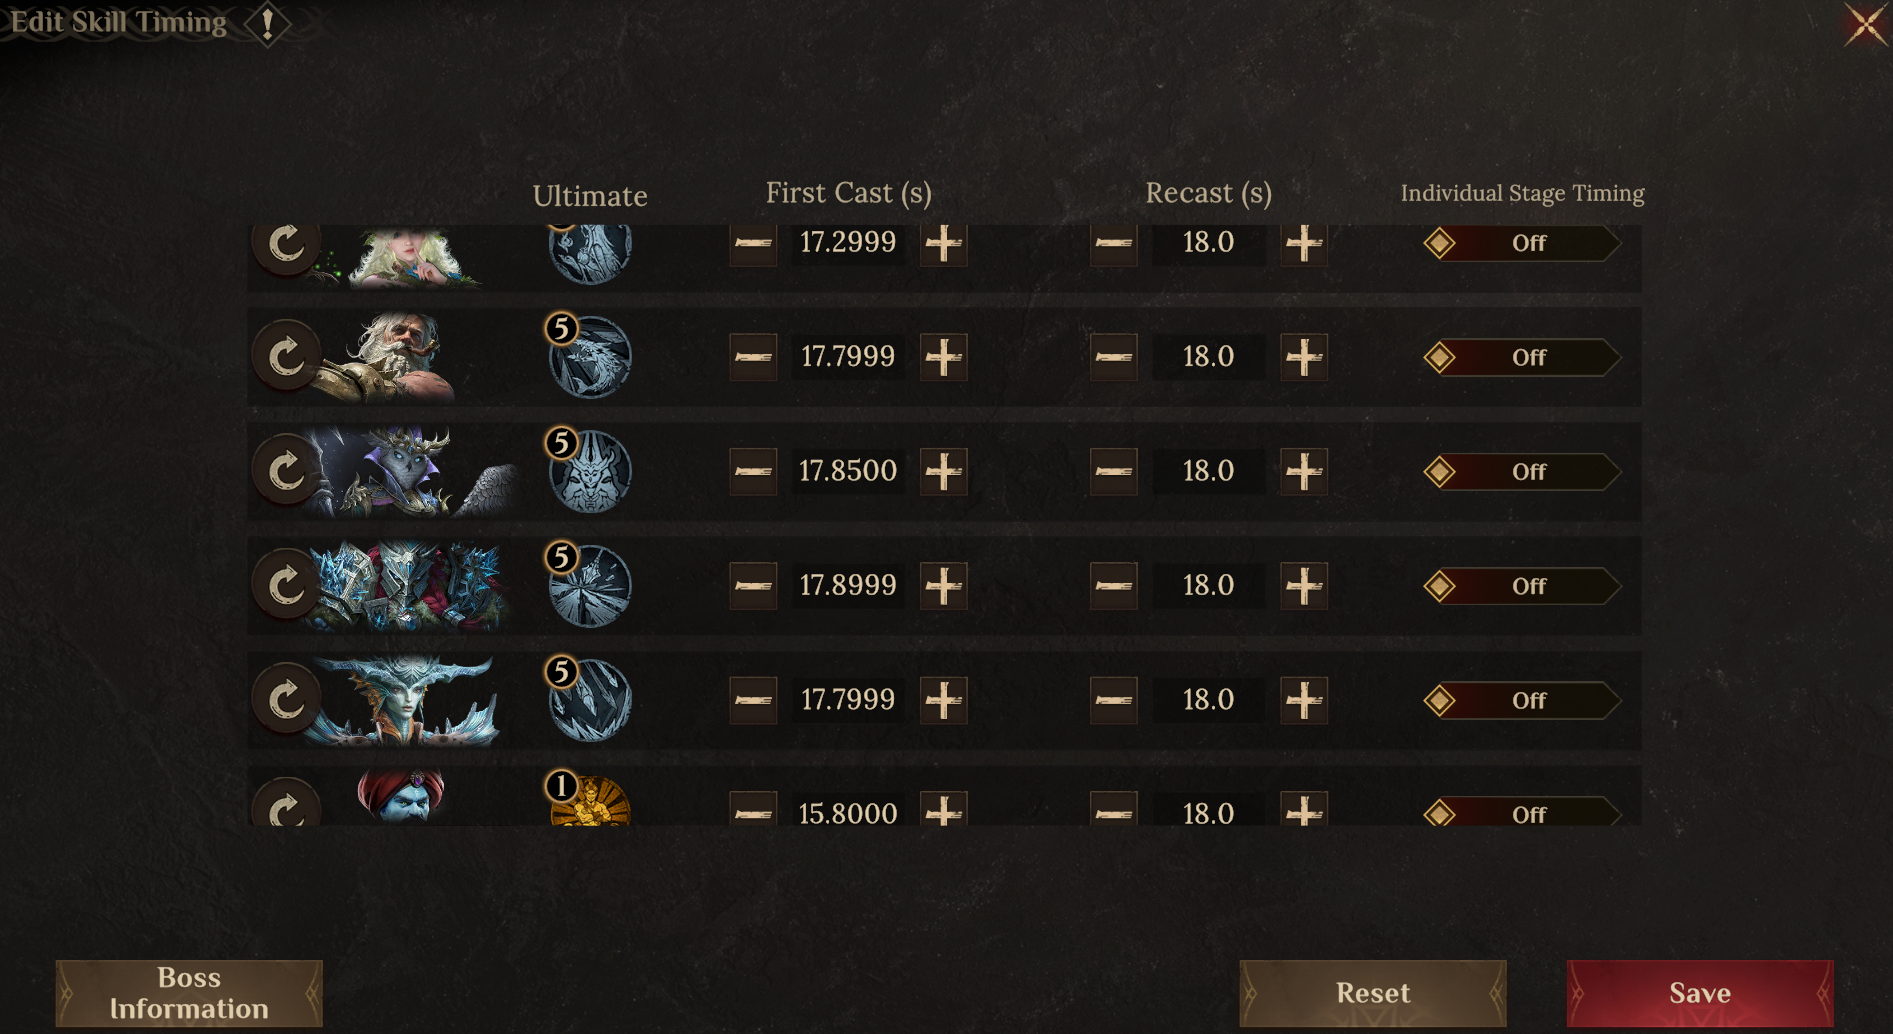
●Skill Timing Reference
●Notes
1. Follow the skill timing above to reduce the impact of the Boss's Ultimate Down, so you don't need to stack Resistance on your heroes;
2. When using Djinn/Starshade Servitor, make sure Beldelle has the highest Attack among allies at the start of battle to gain the Damage Bonus effect provided by the Familiar spell;
3. Since Shinnah must activate Talent - Crystal Melt to dispel the Boss's Buffs, stack as many survivability stats on Shinnah as possible after she meets the Accuracy requirement
●Hero Replacement Reference

Shield
Control Immunity
Control Immunity
|

Replenish Ally Ice Crystal
Increase Ally Damage Output
|

Inflict Ice Crystal
Increase Ally Damage Output
|

Secondary Damage Output
<tp
|

Main Forces Damage Output
|
| Replacement Reference |

Shield
Control Immunity
Attack Penalty
|

Inflict Ice Crystal
Increase Ally Damage Output
|

Inflict Ice Crystal
|

Secondary Damage Output
|

Main Forces Damage Output
|
Build Reference●Key Attribute Requirements
Shinnah: Accuracy > 260;
Felosia: Skill Haste > 62,
For other attributes, prioritize Enlightenment, then HP and Defense.
●Gear Reference
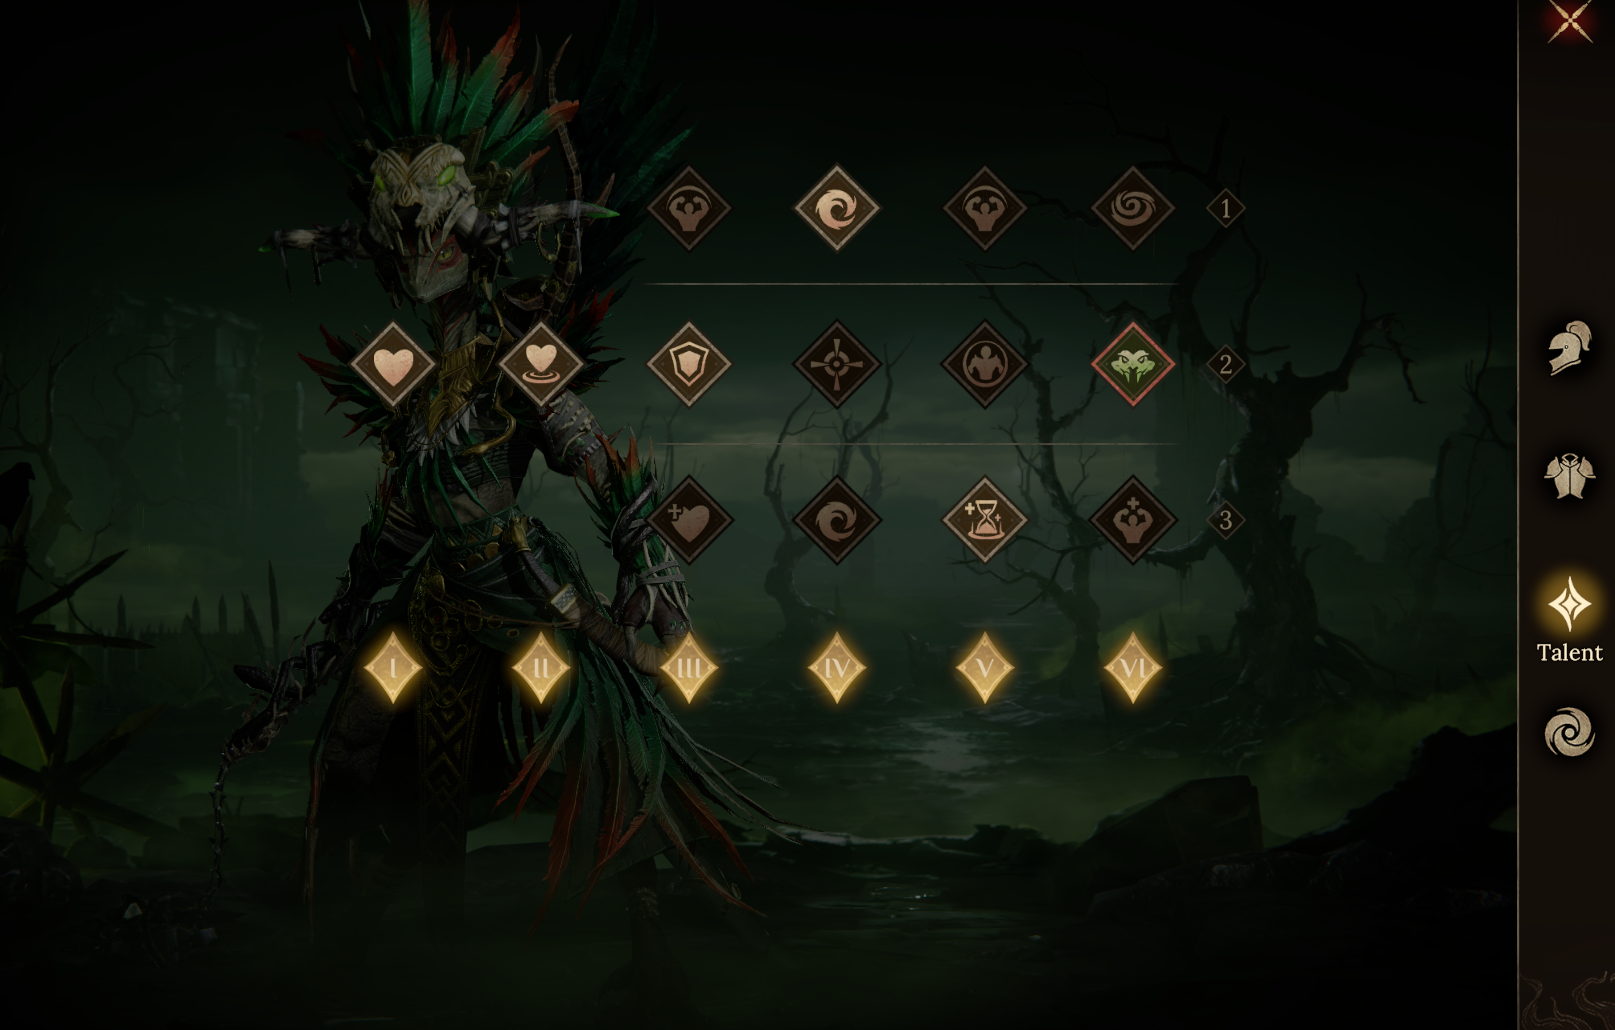
●Talent Reference
[Durem]Team Composition: Reytah + Alarick + Szecedith + Sacredeia + Rook
●Team Aura/Familiar
Use Szecedith's Attack Aura with the Tressym Familiar to maximize the team's damage output.
●Skill Timing Reference
●Notes
1. Adjust your gear so Rook has the highest Attack on your team, allowing him to receive the Ultimate Energy transferred by Alarick;
2. Travelers without Alarick can replace him with Journ or Pardis, or other Devitalization Affinity Survive-type support heroes
●Hero Replacement Reference
Healing
Extend Debuffs
Attack Penalty
|

Secondary Damage Output
Inflict Corrosion
|

Increase Ally Damage Output
|

Main Forces Damage Output
|
| Replacement Reference |

Healing
Attack Penalty
|

Inflict Corrosion
|

Increase Ally Damage Output
|

Main Forces Damage Output
|
Build Reference●Key Attribute Requirements
Reytah, Alarick, and Sacredeia: Accuracy > 260;
Szecedith and Sacredeia: keep Skill Haste the same;
Reytah: Skill Haste > 40;
Alarick: stack Skill Haste as high as possible
●Gear Reference
●Talent Reference
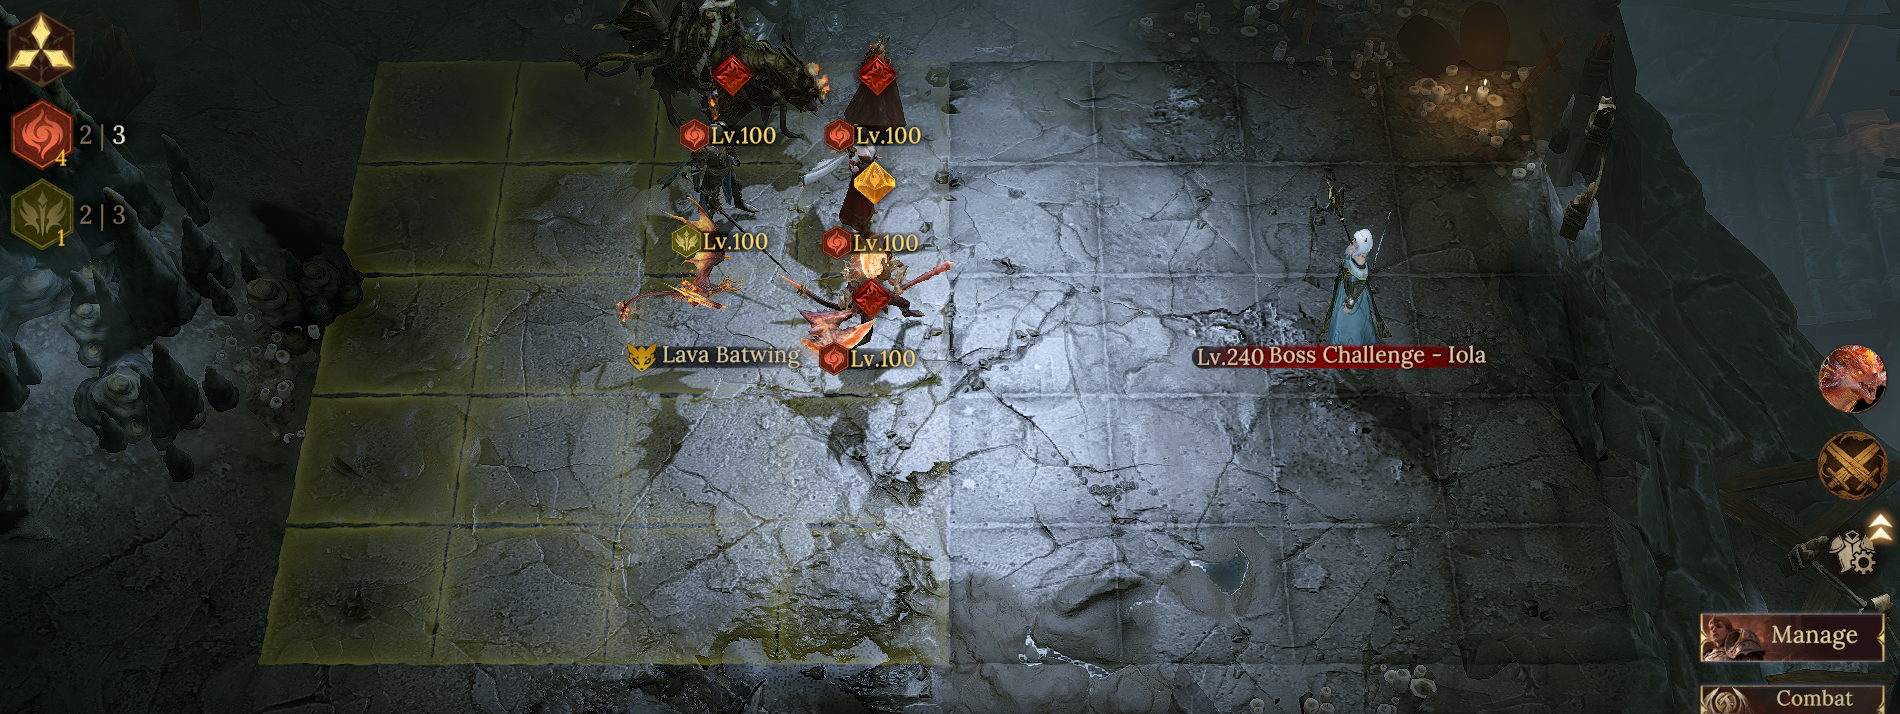
[Iola]Team Composition: Flora + Felicity + Chorak + Thorgos + Synarell
●Team Aura/Familiar
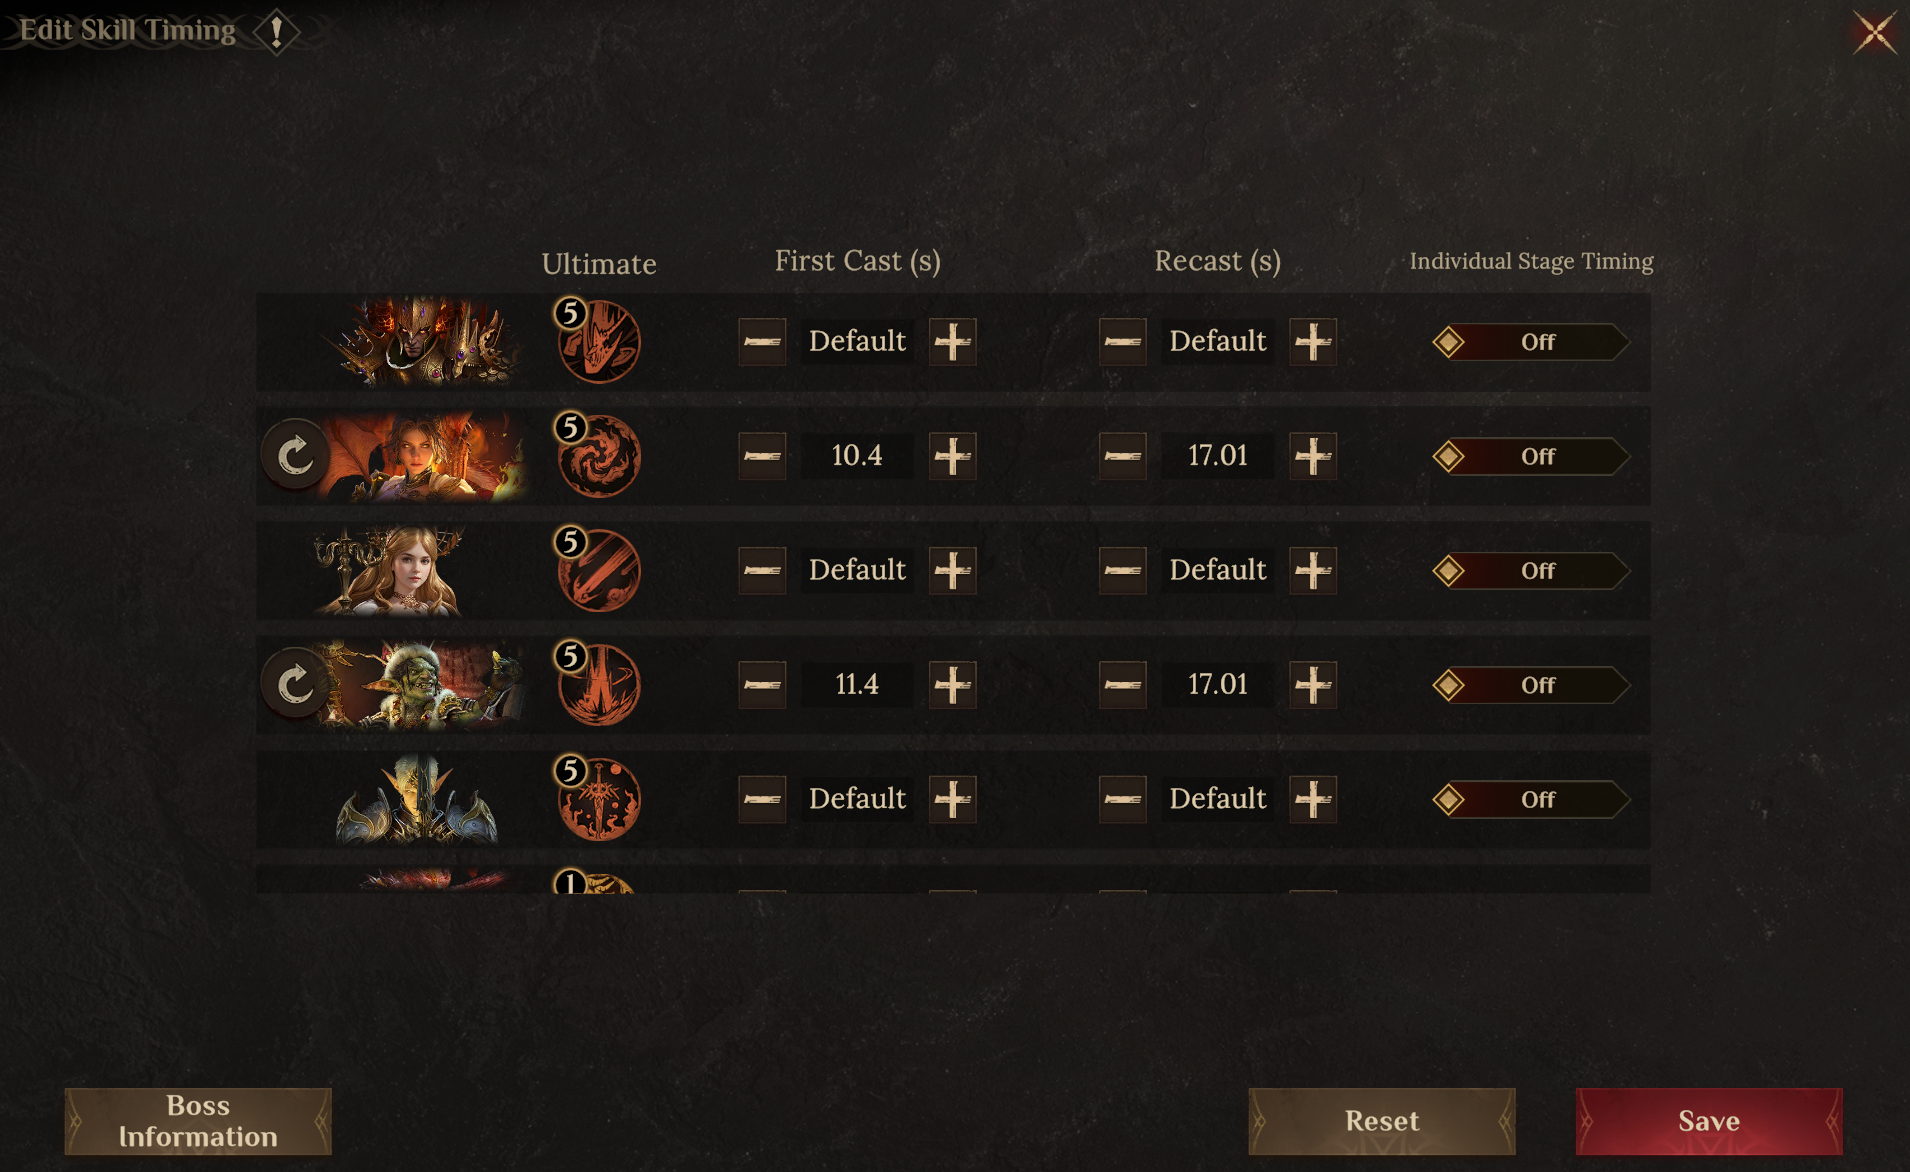
Use Flora's Attack Aura with the Batwing Familiar to maximize the team's damage output.
●Skill Timing Reference
●Notes
1. Position your heroes as shown. Activate Talent - Stand United for Synarell and stack her Resistance to share stats with allies. If you do not have Synarell, replace her with another Incandescence Affinity Survive Support that can activate Talent - Stand United;
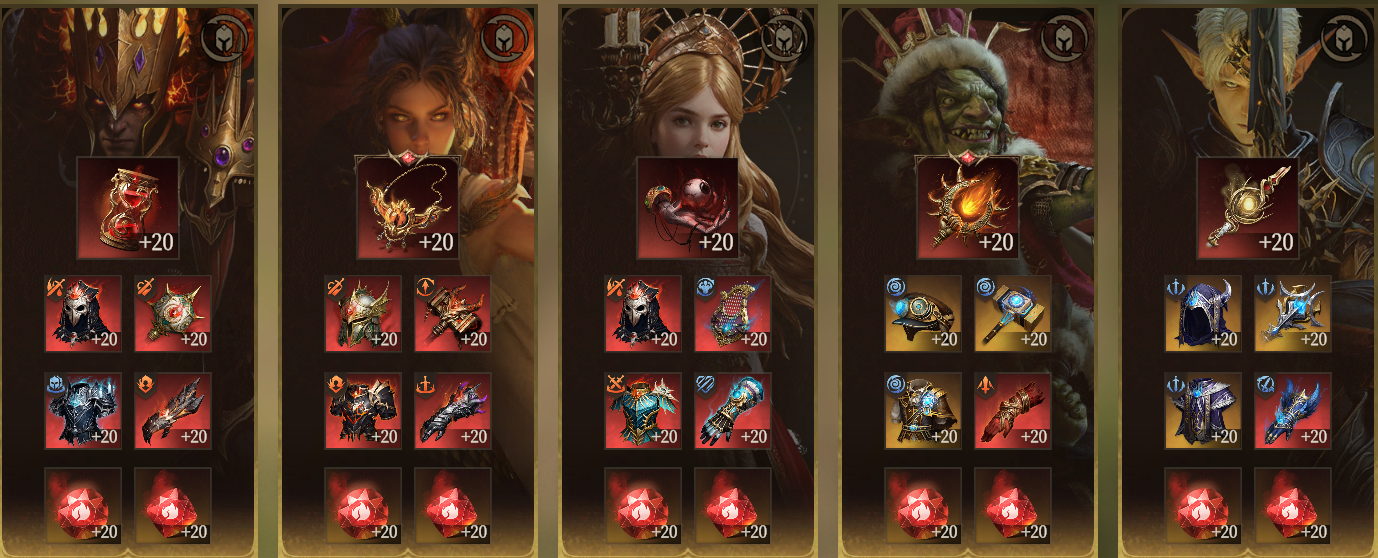
2. Stack as much Attack as possible on Thorgos to increase the stats shared with Flora through Everlasting Candleflame. Travelers without Thorgos can replace him with Caspar
●Hero Replacement Reference

Healing, Invincibility
Dispel Debuffs
Attack Penalty
|

Defense Penalty
High-Frequency Wild Throw
|

Increase Wild Throw Points
|

Secondary Damage Output
High-Frequency Wild Throw
|
| Replacement Reference |

Increase Ultimate Energy
Healing, Shield
|

Secondary Damage Output
High-Frequency Wild Throw
|

Increase Wild Throw Points
|
Secondary Damage Output
|
Build Reference●Key Attribute Requirements
Thorgos and Synarell: stack Skill Haste as high as possible
Other heroes: Skill Haste > 25;
Felicity: Crit Rate reaches 100% and Accuracy > 260;
Synarell: Resistance > 400. Prioritize Attack for remaining stats
Other heroes: around 200 Resistance is enough.
●Gear Reference
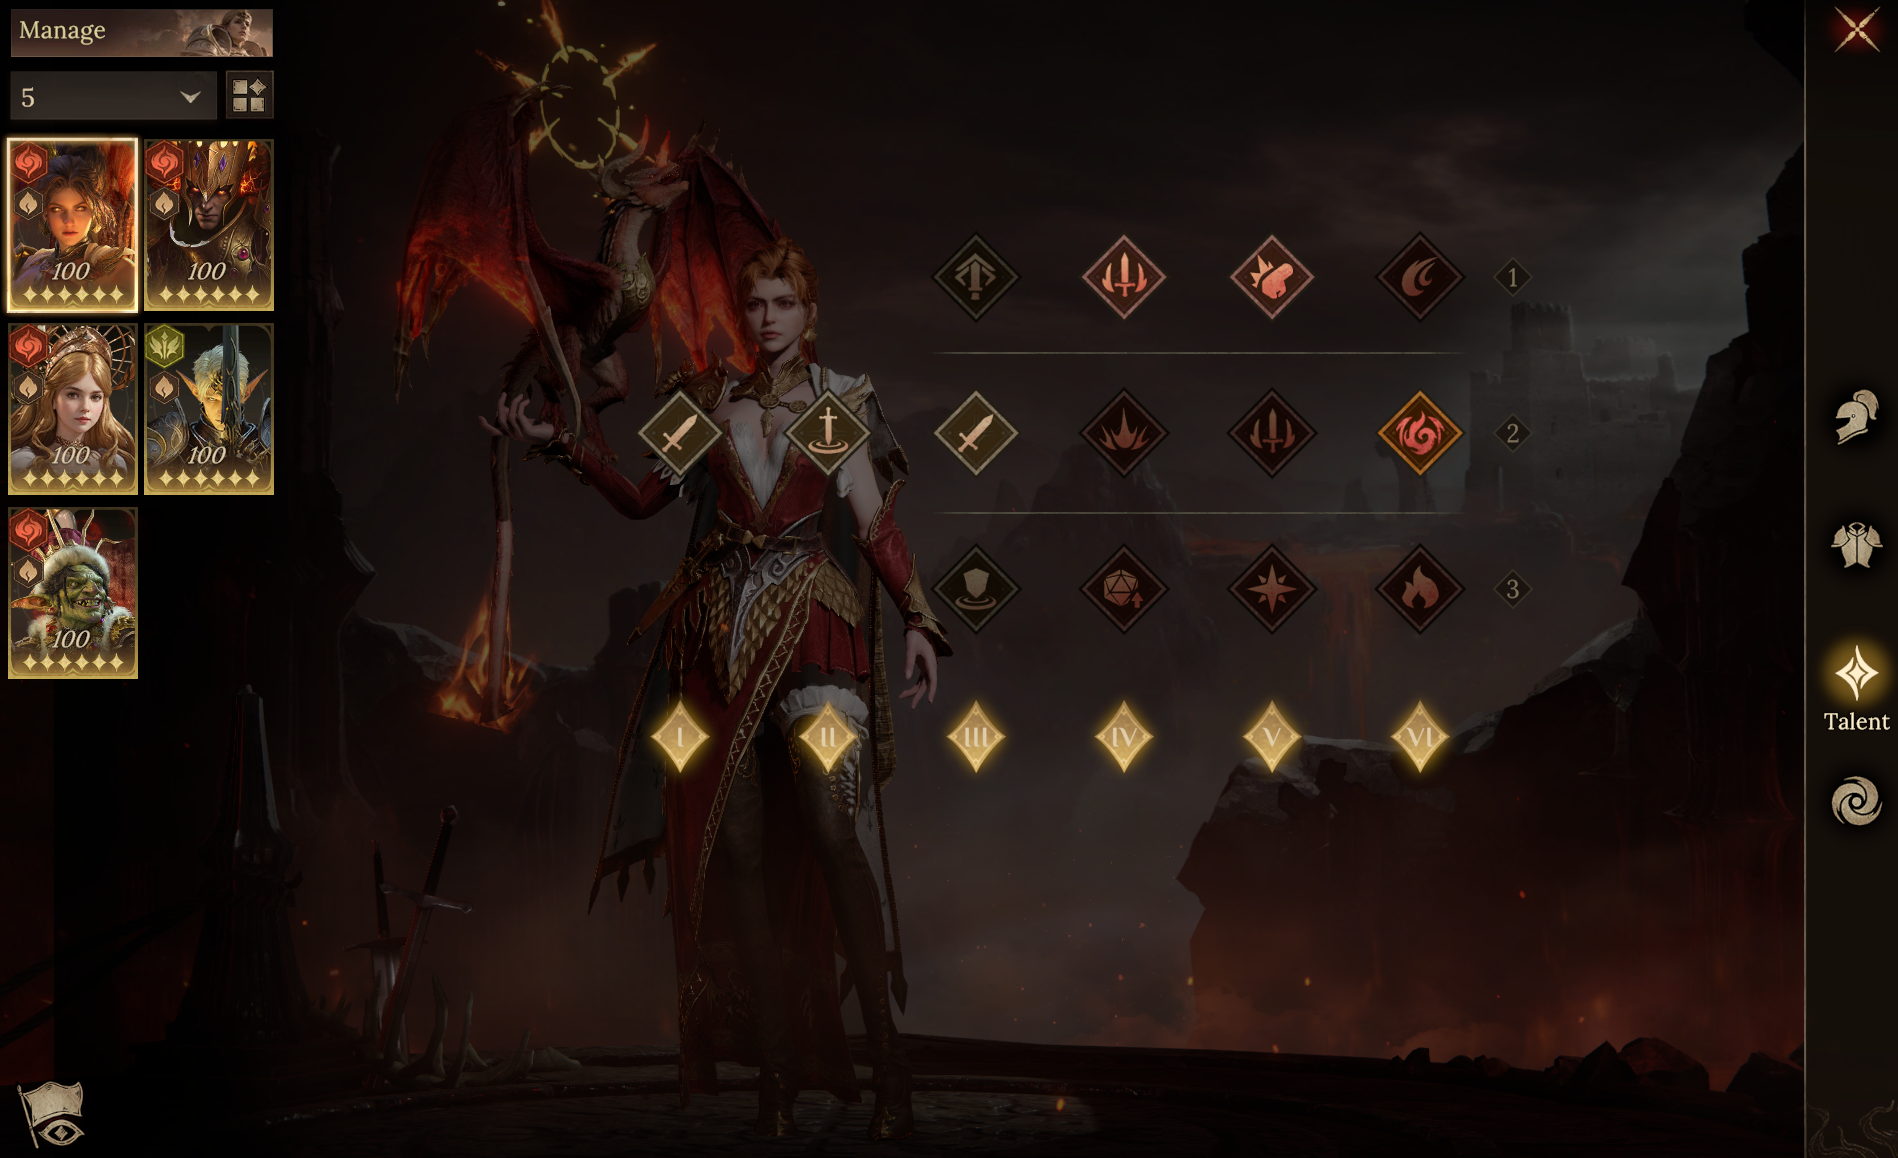
●Talent Reference
|
|
|
|